This integration requires a paid Webflow plan to allow embedding custom scripts into your site.
Add a custom form script to your Webflow site
If you do not add the custom script in the correct place, the form may not work properly.
Where to add the script
- If you have a Cocoonmail form on every page of your site, add this code to the “Footer code” section in your Site settings (read how in the Webflow docs).
- If you have a Cocoonmail form on only one page, add this code to the “Before body tag” section in your Page setting (read how in the Webflow docs).
Add a form to your page
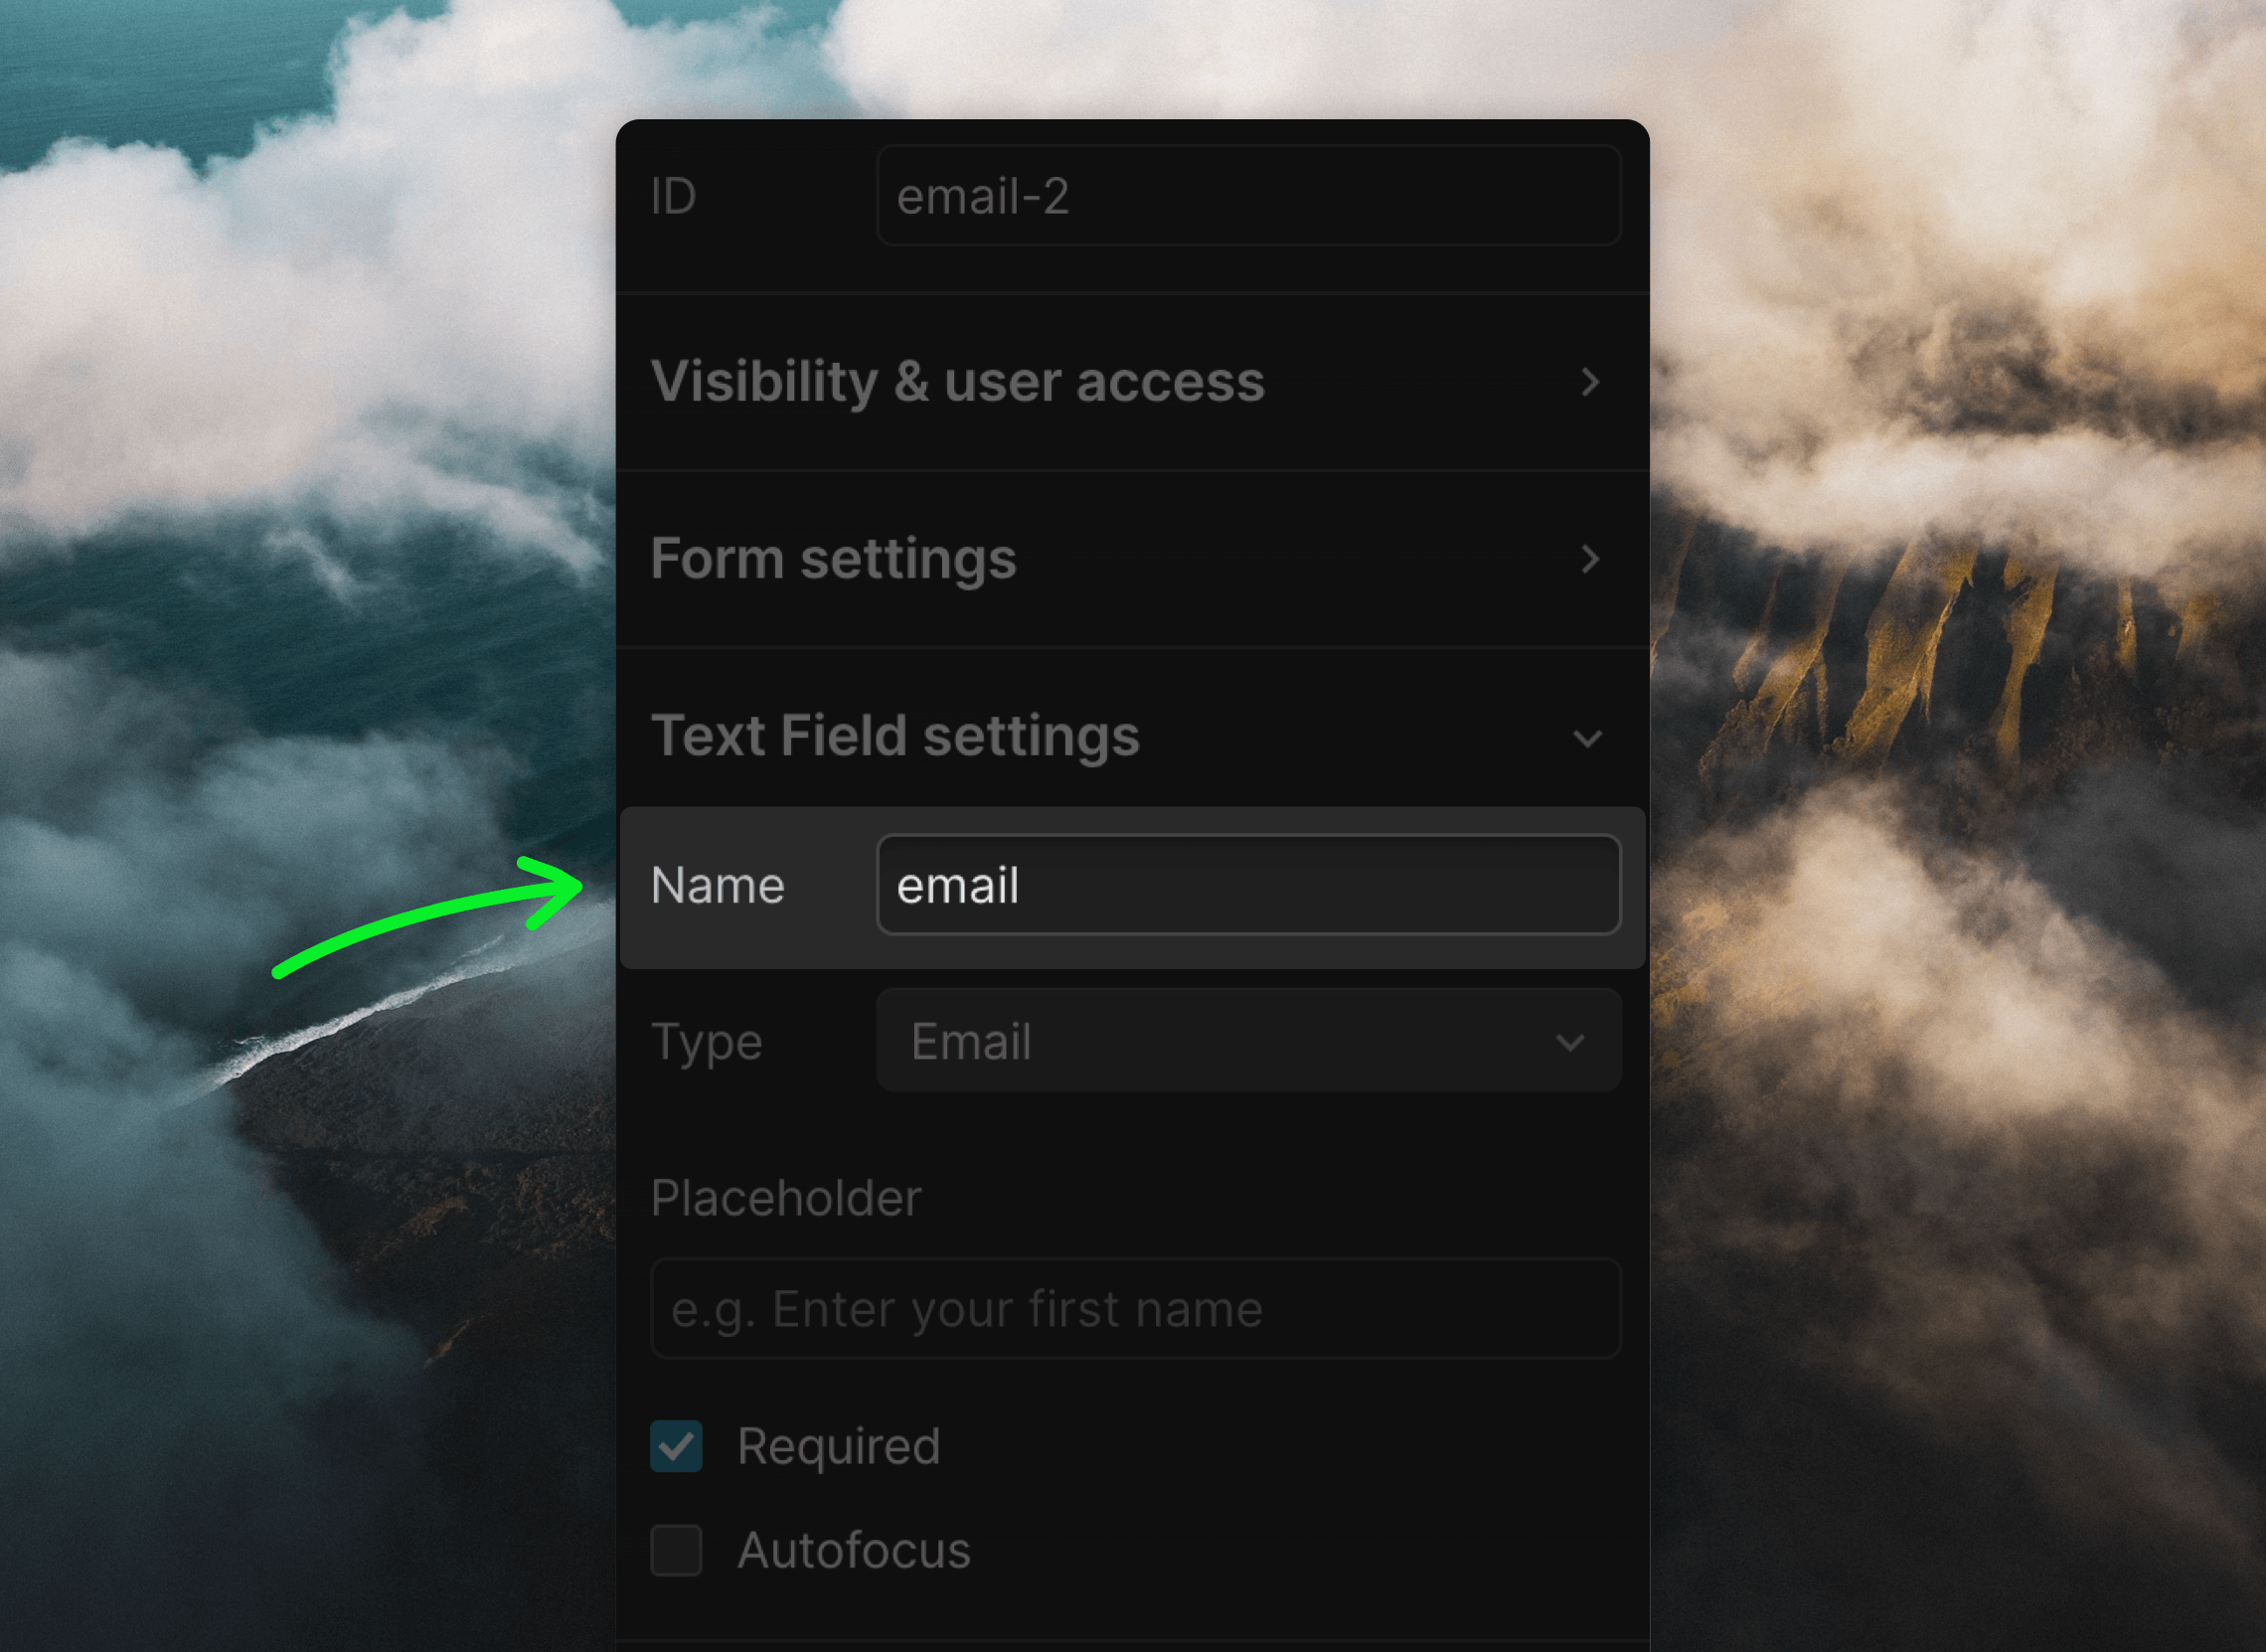
Next you need to create a form in your Webflow page. Use the “Input” and “Button” elements. When you add new fields, make sure the “Name” value in the field’s settings panel matches the name of the field in Cocoonmail:email, firstName, etc. You can check the full list of your available properties from your API Settings page.
Please make sure these contact properties already exist in your Cocoonmail account. You can add new contact properties in API Settings, with a CSV import or using the API.
3 How to add hidden fields
You may want to assign a property to all contacts that submit the form (for example,source or userGroup).
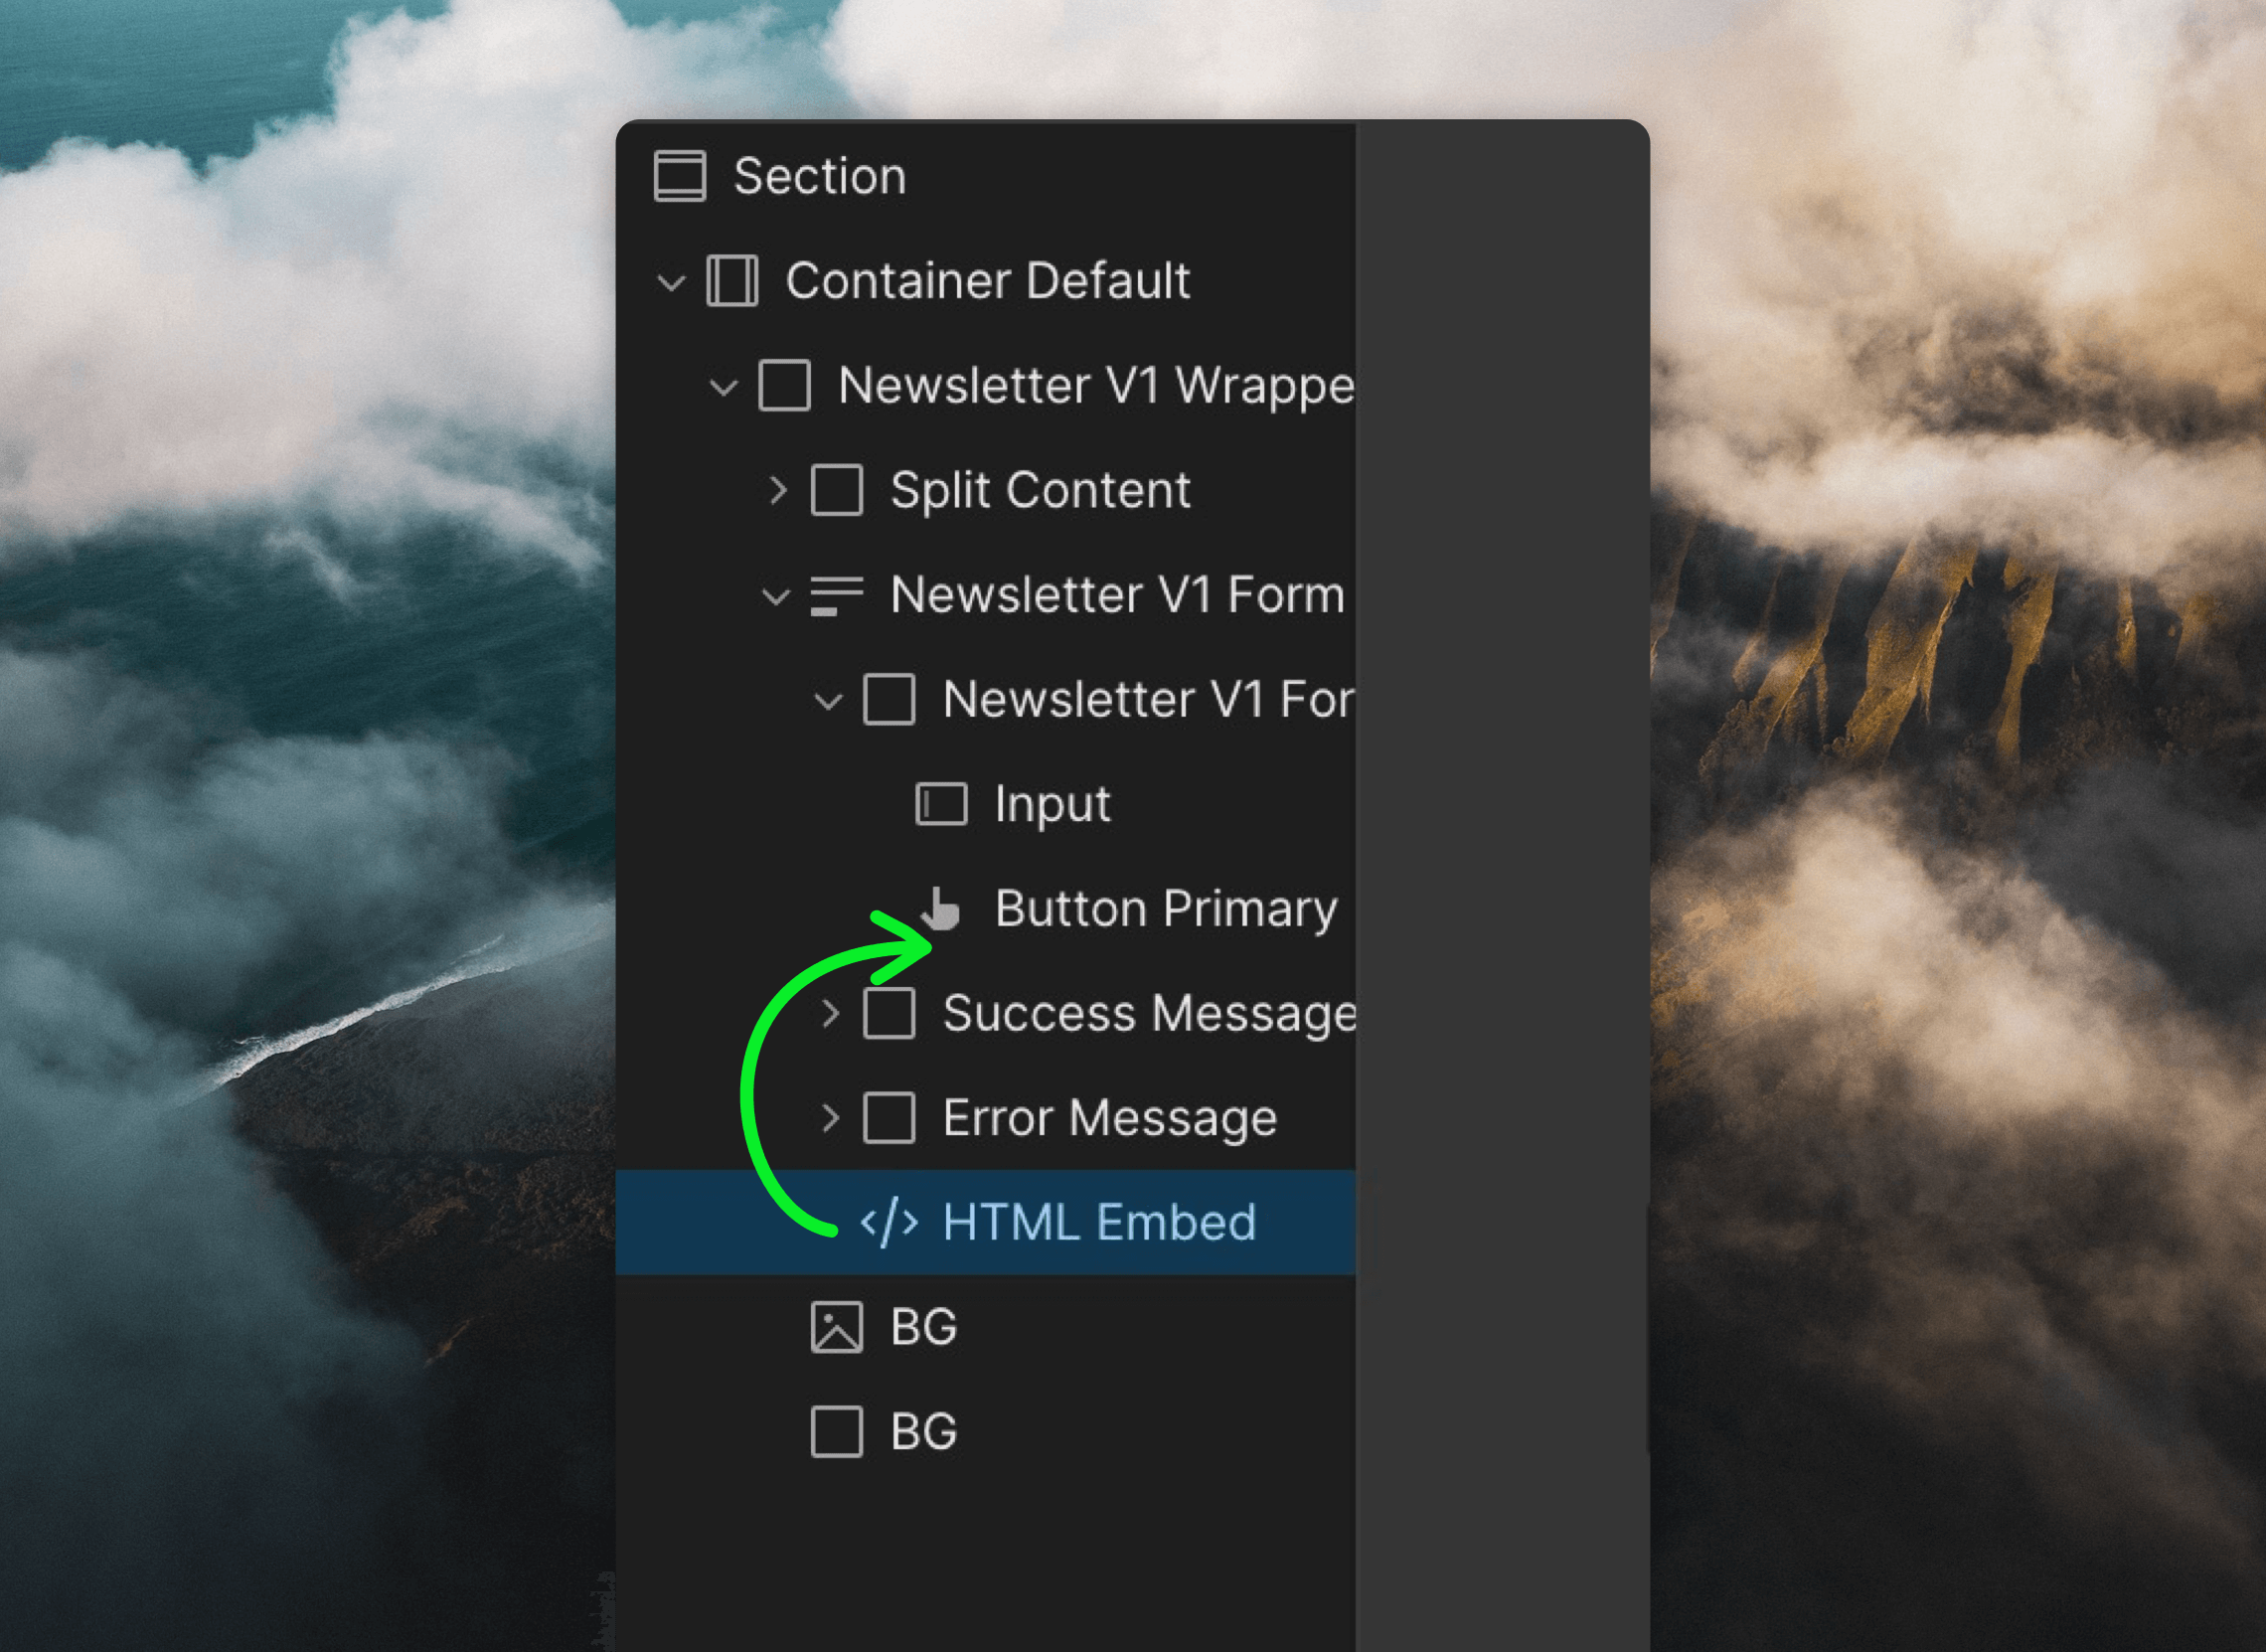
For this add an “Embed” component inside your form on the same level as your input and button elements.
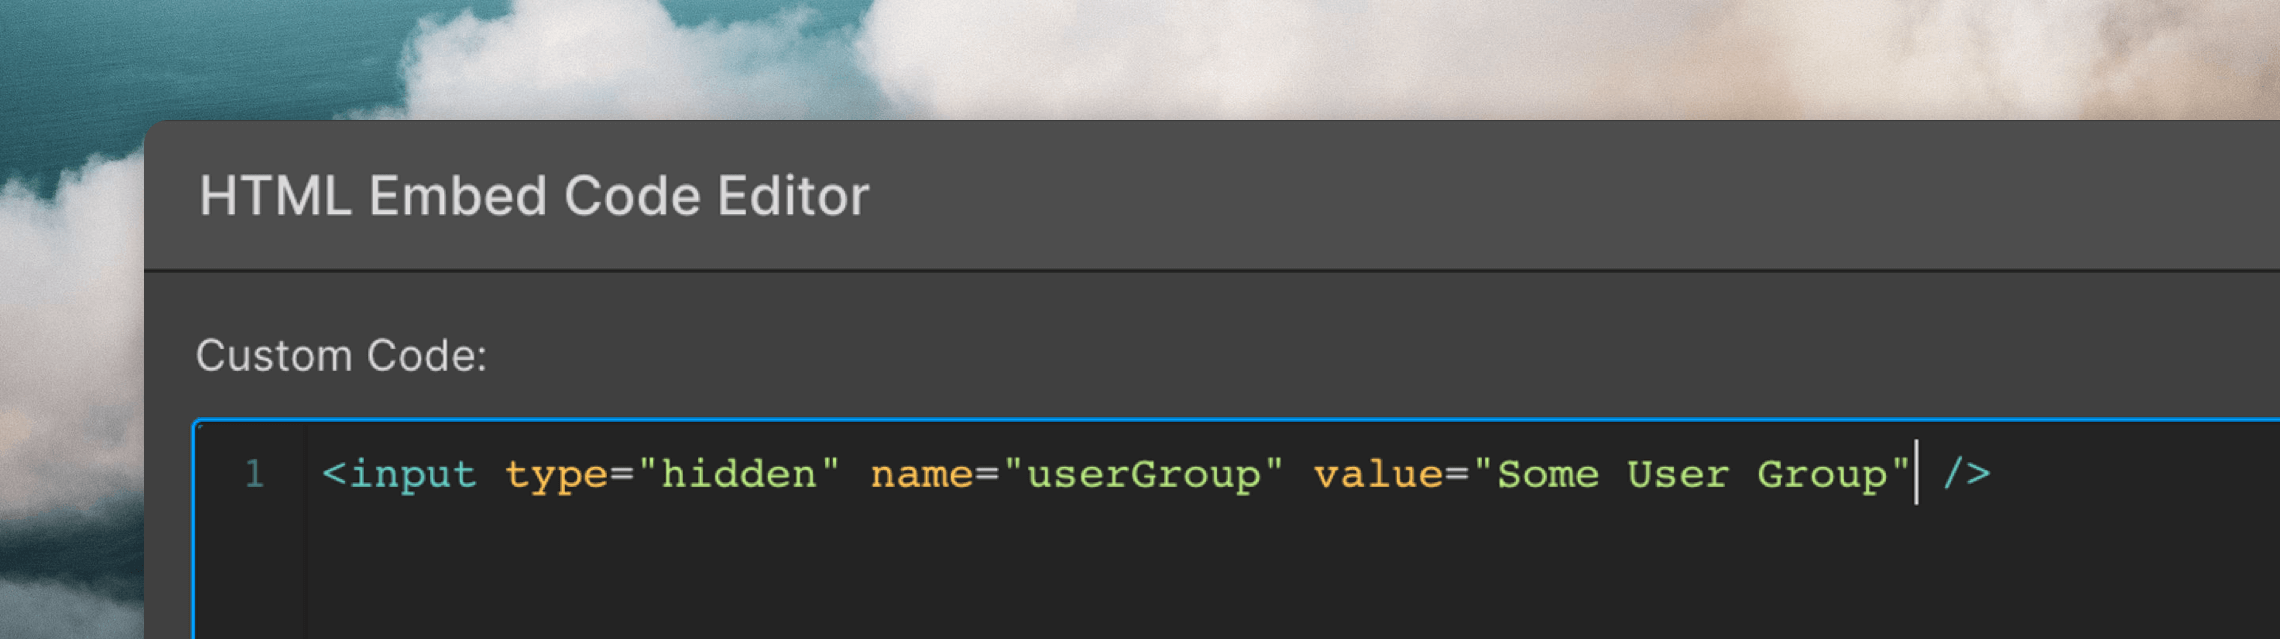
 In this Embed element add a hidden text field that passes on the custom value to Cocoonmail (make sure the
 name values match the “API Name” values in your API Settings).
Add your Cocoonmail form endpoint URL
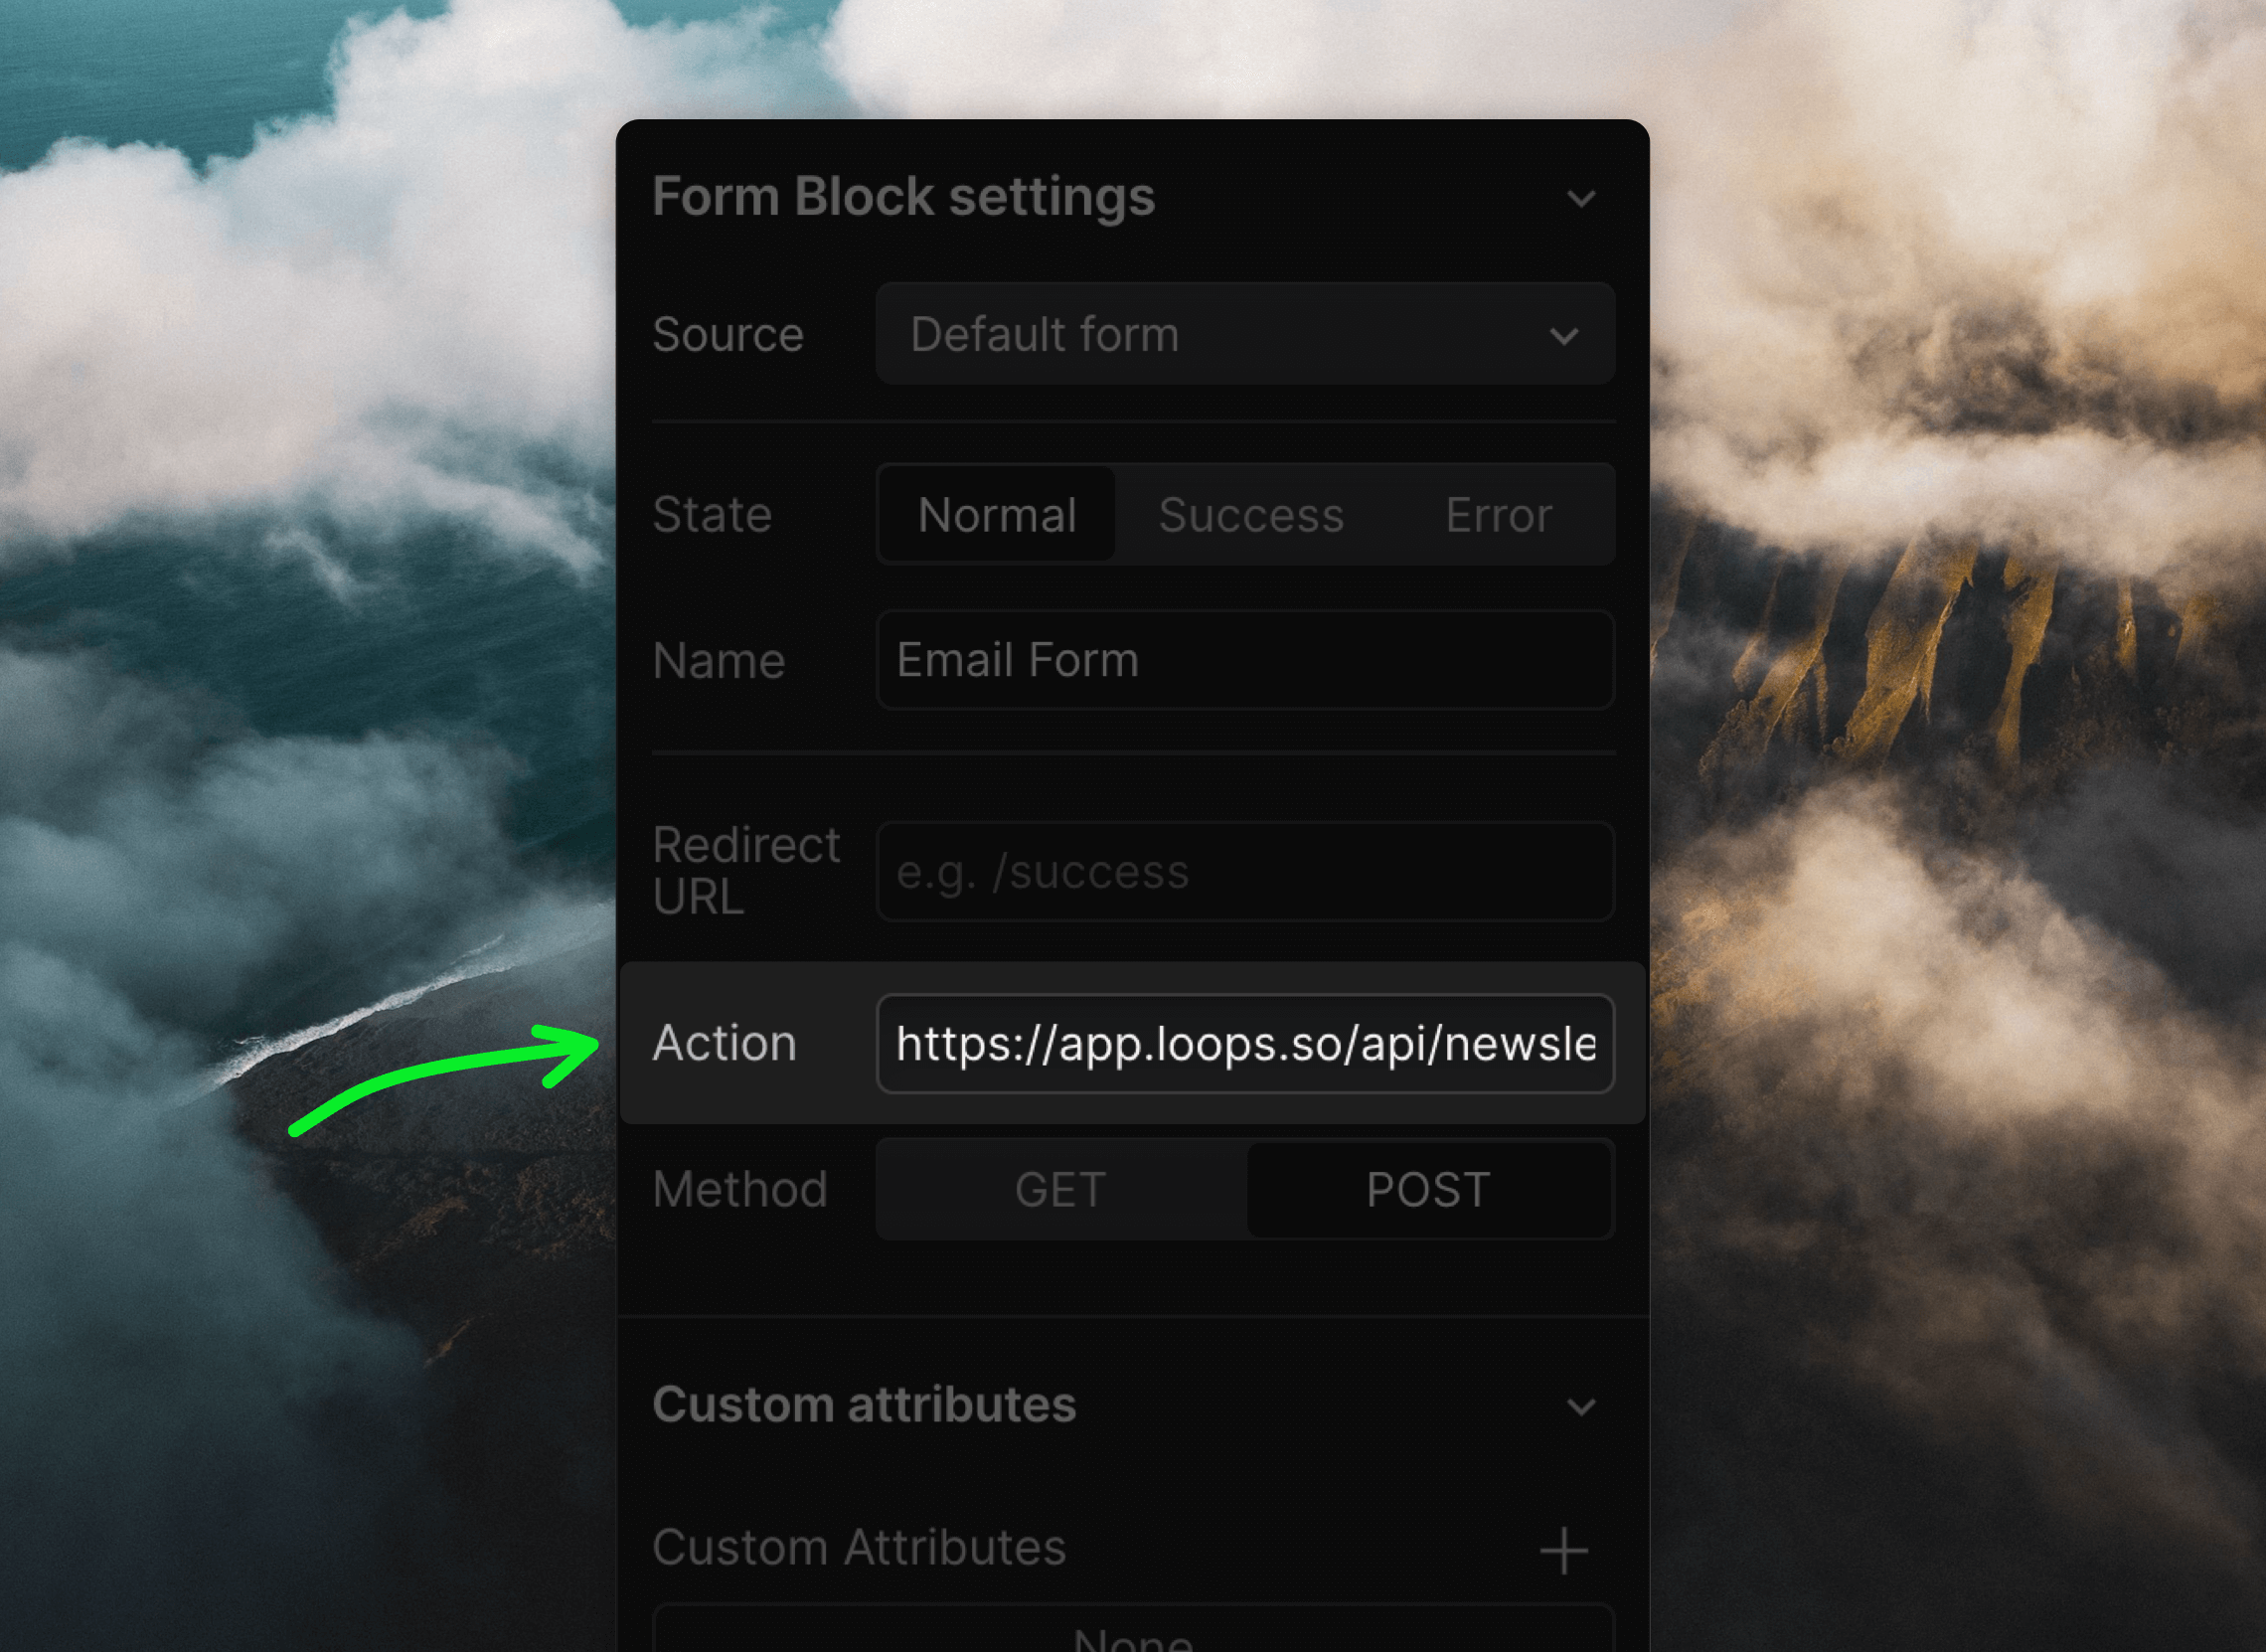
The last step is to make sure your form submits data to Cocoonmail. You do this by adding a Cocoonmail form endpoint as the form’s “Action” value.- Go to the Forms page in your Cocoonmail account.
- Click on the Settings tab.
- Copy the URL shown in the Form Endpoint field.
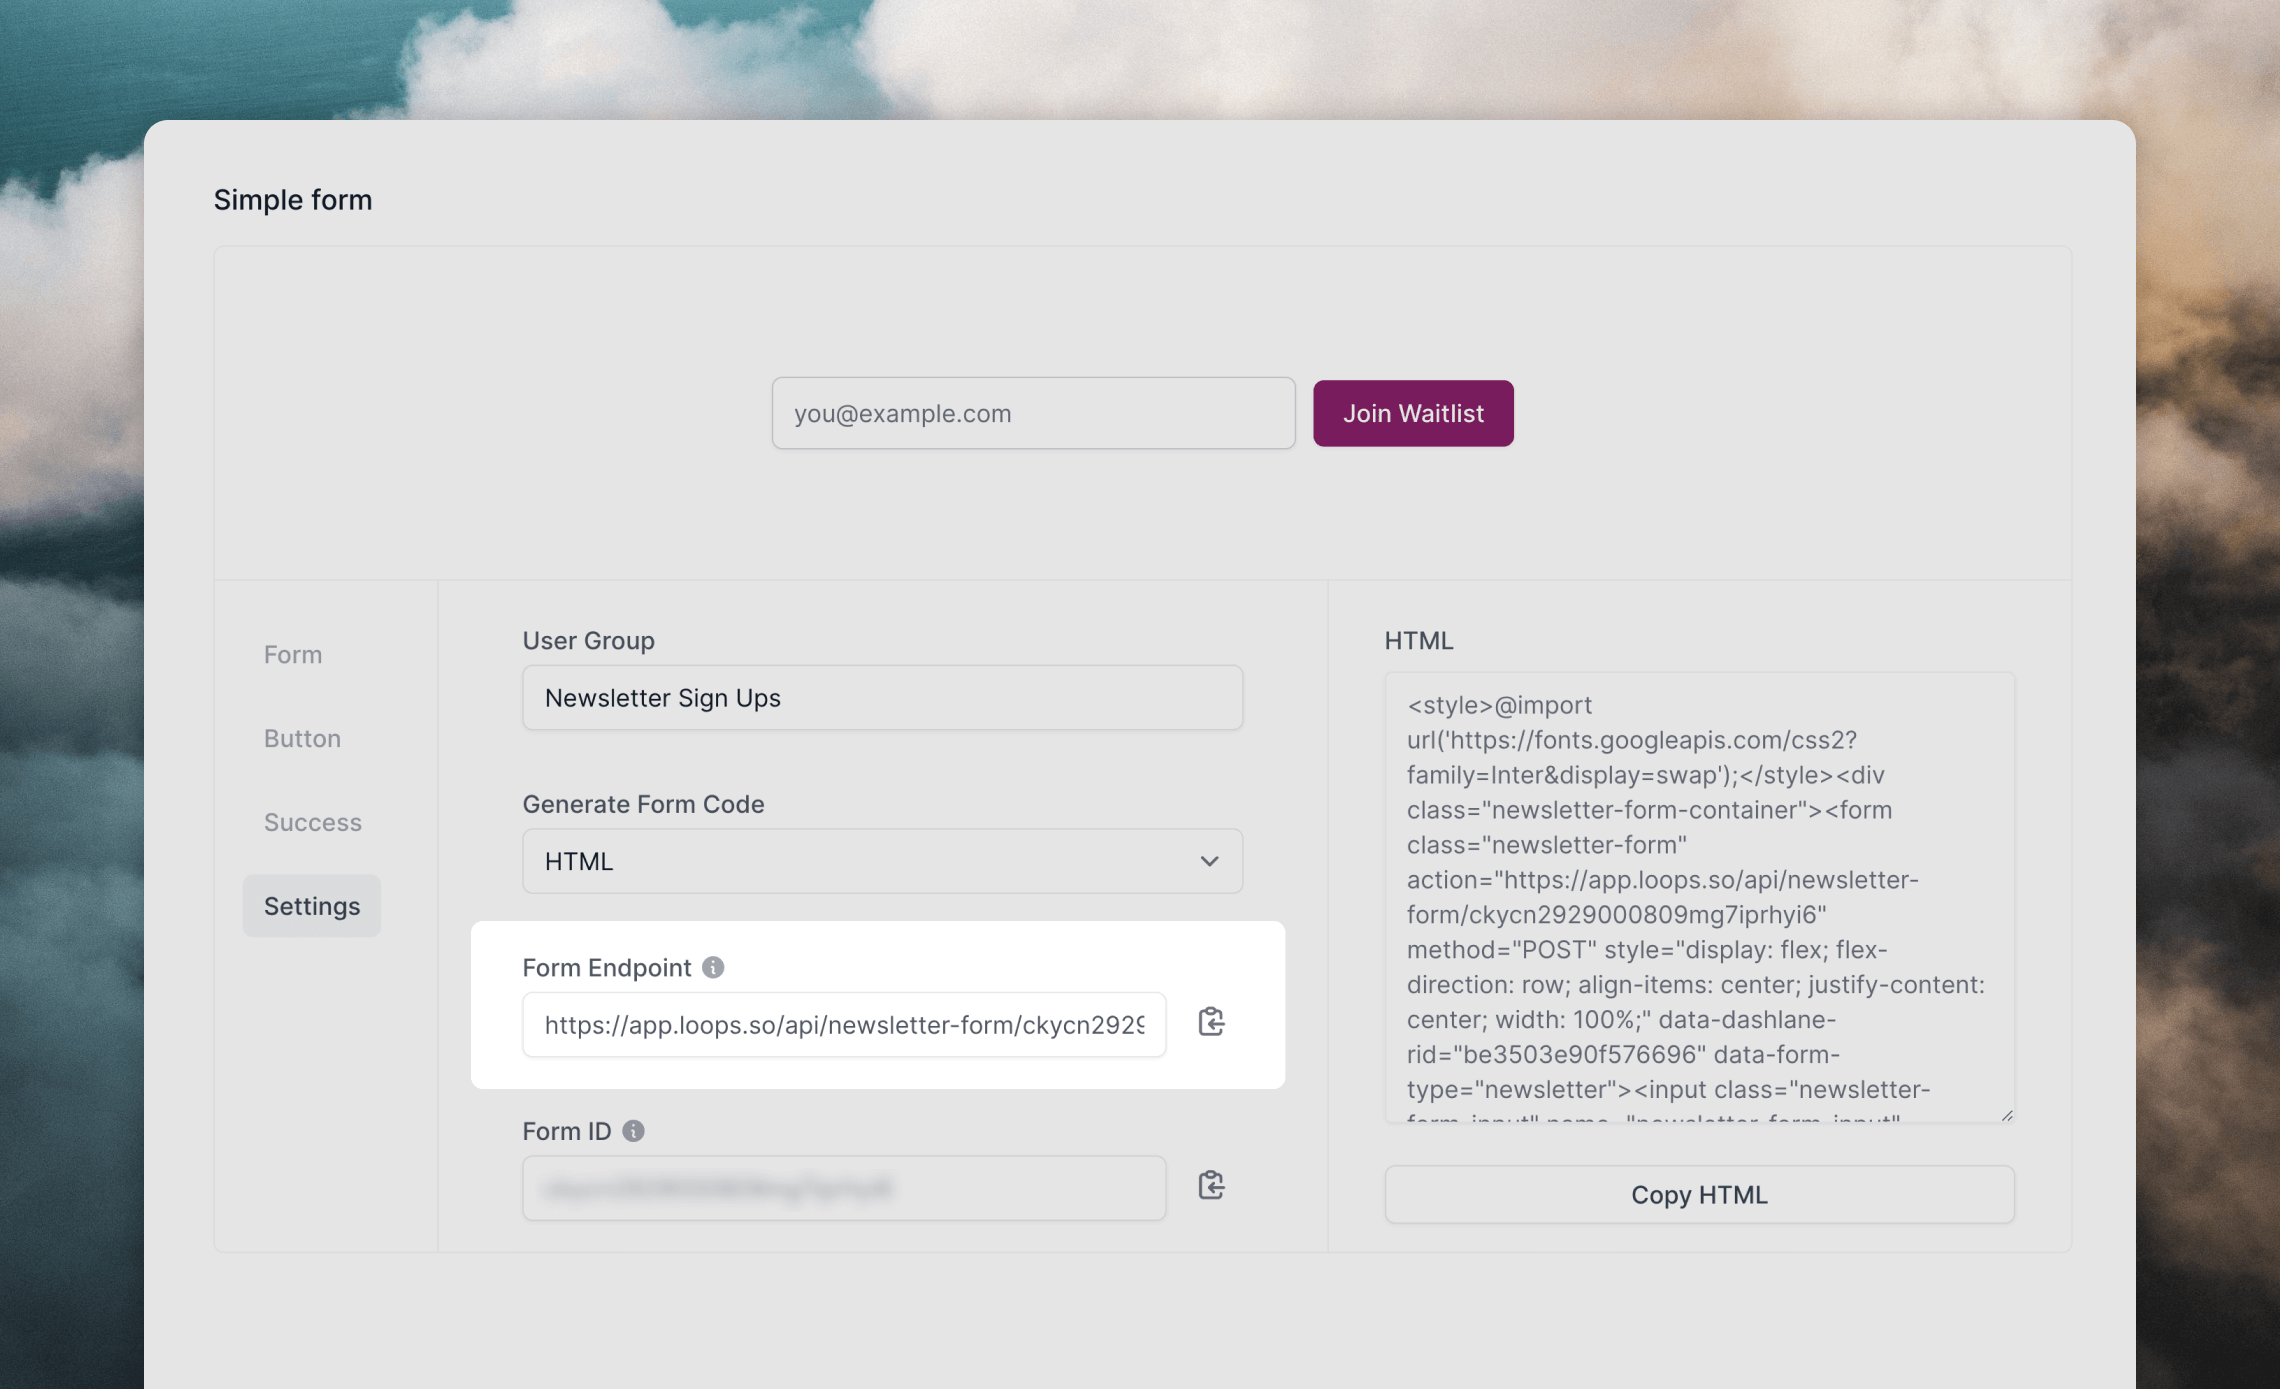
- In Webflow, click on your Form Block, go to the Settings panel and paste the URL into the Action field.
Our form submission endpoint has rate limiting, so you will see an error in testing if you submit more than once per minute or submit the same email twice.