Authentication
Start here if you want to use the Cocoonmail API to add contacts to your Cocoonmail audience, update their attributes, and send events to Cocoonmail.Authentication Steps
Authentication Steps
To get started, you’ll need an API key. Visit the Cocoonmail settings page and click “Generate new key”
 This creates an API key. You can assign it a human-readable name:
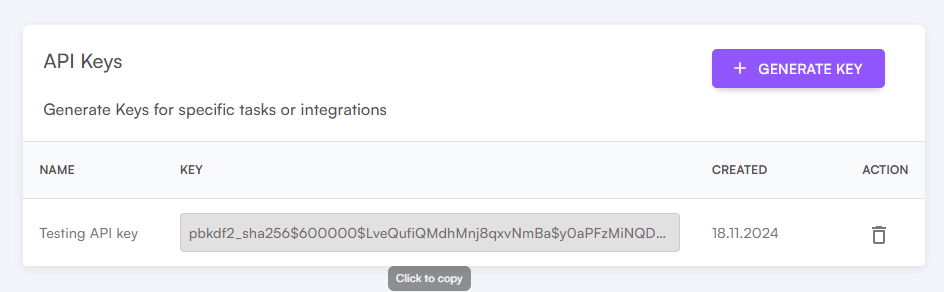
 We suggest using a different API key for different purposes. You can revoke an API key at any time with the trash icon.When making an API call, add an Authorization header and set the API key as a Bearer token:You can test your API key by making a
This creates an API key. You can assign it a human-readable name:We suggest using a different API key for different purposes. You can revoke an API key at any time with the trash icon.When making an API call, add an Authorization header and set the API key as a Bearer token:You can test your API key by making a GET request to https://app.cocoonmail.com/webhook/api_key/validate/. If successful, you will receive { "success": true }As a Curl request (replace pbkdf2_sha256$600000$8ELnVRTWG2JddDkU3gP59U$eZFMR4pr349lcc3gTHK24vPthVMsY279jpoL/W2g3Mo= with your own API key):Rate Limiting
To ensure the quality of service for all users, our API is rate limited. This means there’s a limit to the number of requests your application can make to our API in a certain time frame. The baseline rate limit is 10 requests per second per team.Rate Limiting Details
Rate Limiting Details
To see your current usage, we provide the following response headers in every API response: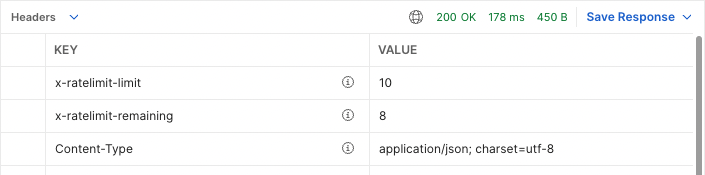 If you exceed this limit, you’ll receive a response with HTTP status
 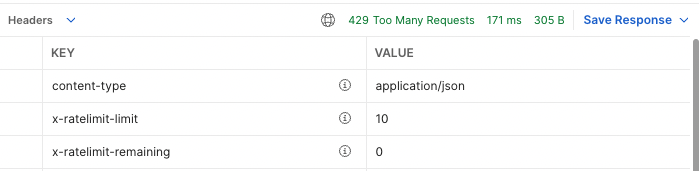 It’s important to handle these 429 responses in your application. We recommend implementing retries with an exponential backoff strategy.If your use case requires a higher limit, please contact us and we’ll be happy to discuss your needs.
x-ratelimit-limit: The maximum number of requests you can make per second.x-ratelimit-remaining: The number of requests remaining in the current rate limit window.
If you exceed this limit, you’ll receive a response with HTTP status 429 Too Many Requests. Here is an example of a failed response with rate limit headers:It’s important to handle these 429 responses in your application. We recommend implementing retries with an exponential backoff strategy.If your use case requires a higher limit, please contact us and we’ll be happy to discuss your needs.SDKs
SDKs are software packages built on top of the API, making it easier to integrate into your project.Javascript
The official JavaScript/TypeScript SDK for Cocoonmail.
Ruby
The official Ruby SDK for Cocoonmail.