Our Segment integration lets you:
- Create and update contacts
- Send events to trigger cocoonmail
Configuring the destination
After opening the link above, click Configure Cocoonmail (Actions). Select your data source, give the destination a name, and click Create destination.
Next, you’ll need an API key. You can generate a new one for Segment on the Cocoonmail API Settings page.
Enter the API key on your Segment destination settings:
Select your data source, give the destination a name, and click Create destination.
Next, you’ll need an API key. You can generate a new one for Segment on the Cocoonmail API Settings page.
Enter the API key on your Segment destination settings:
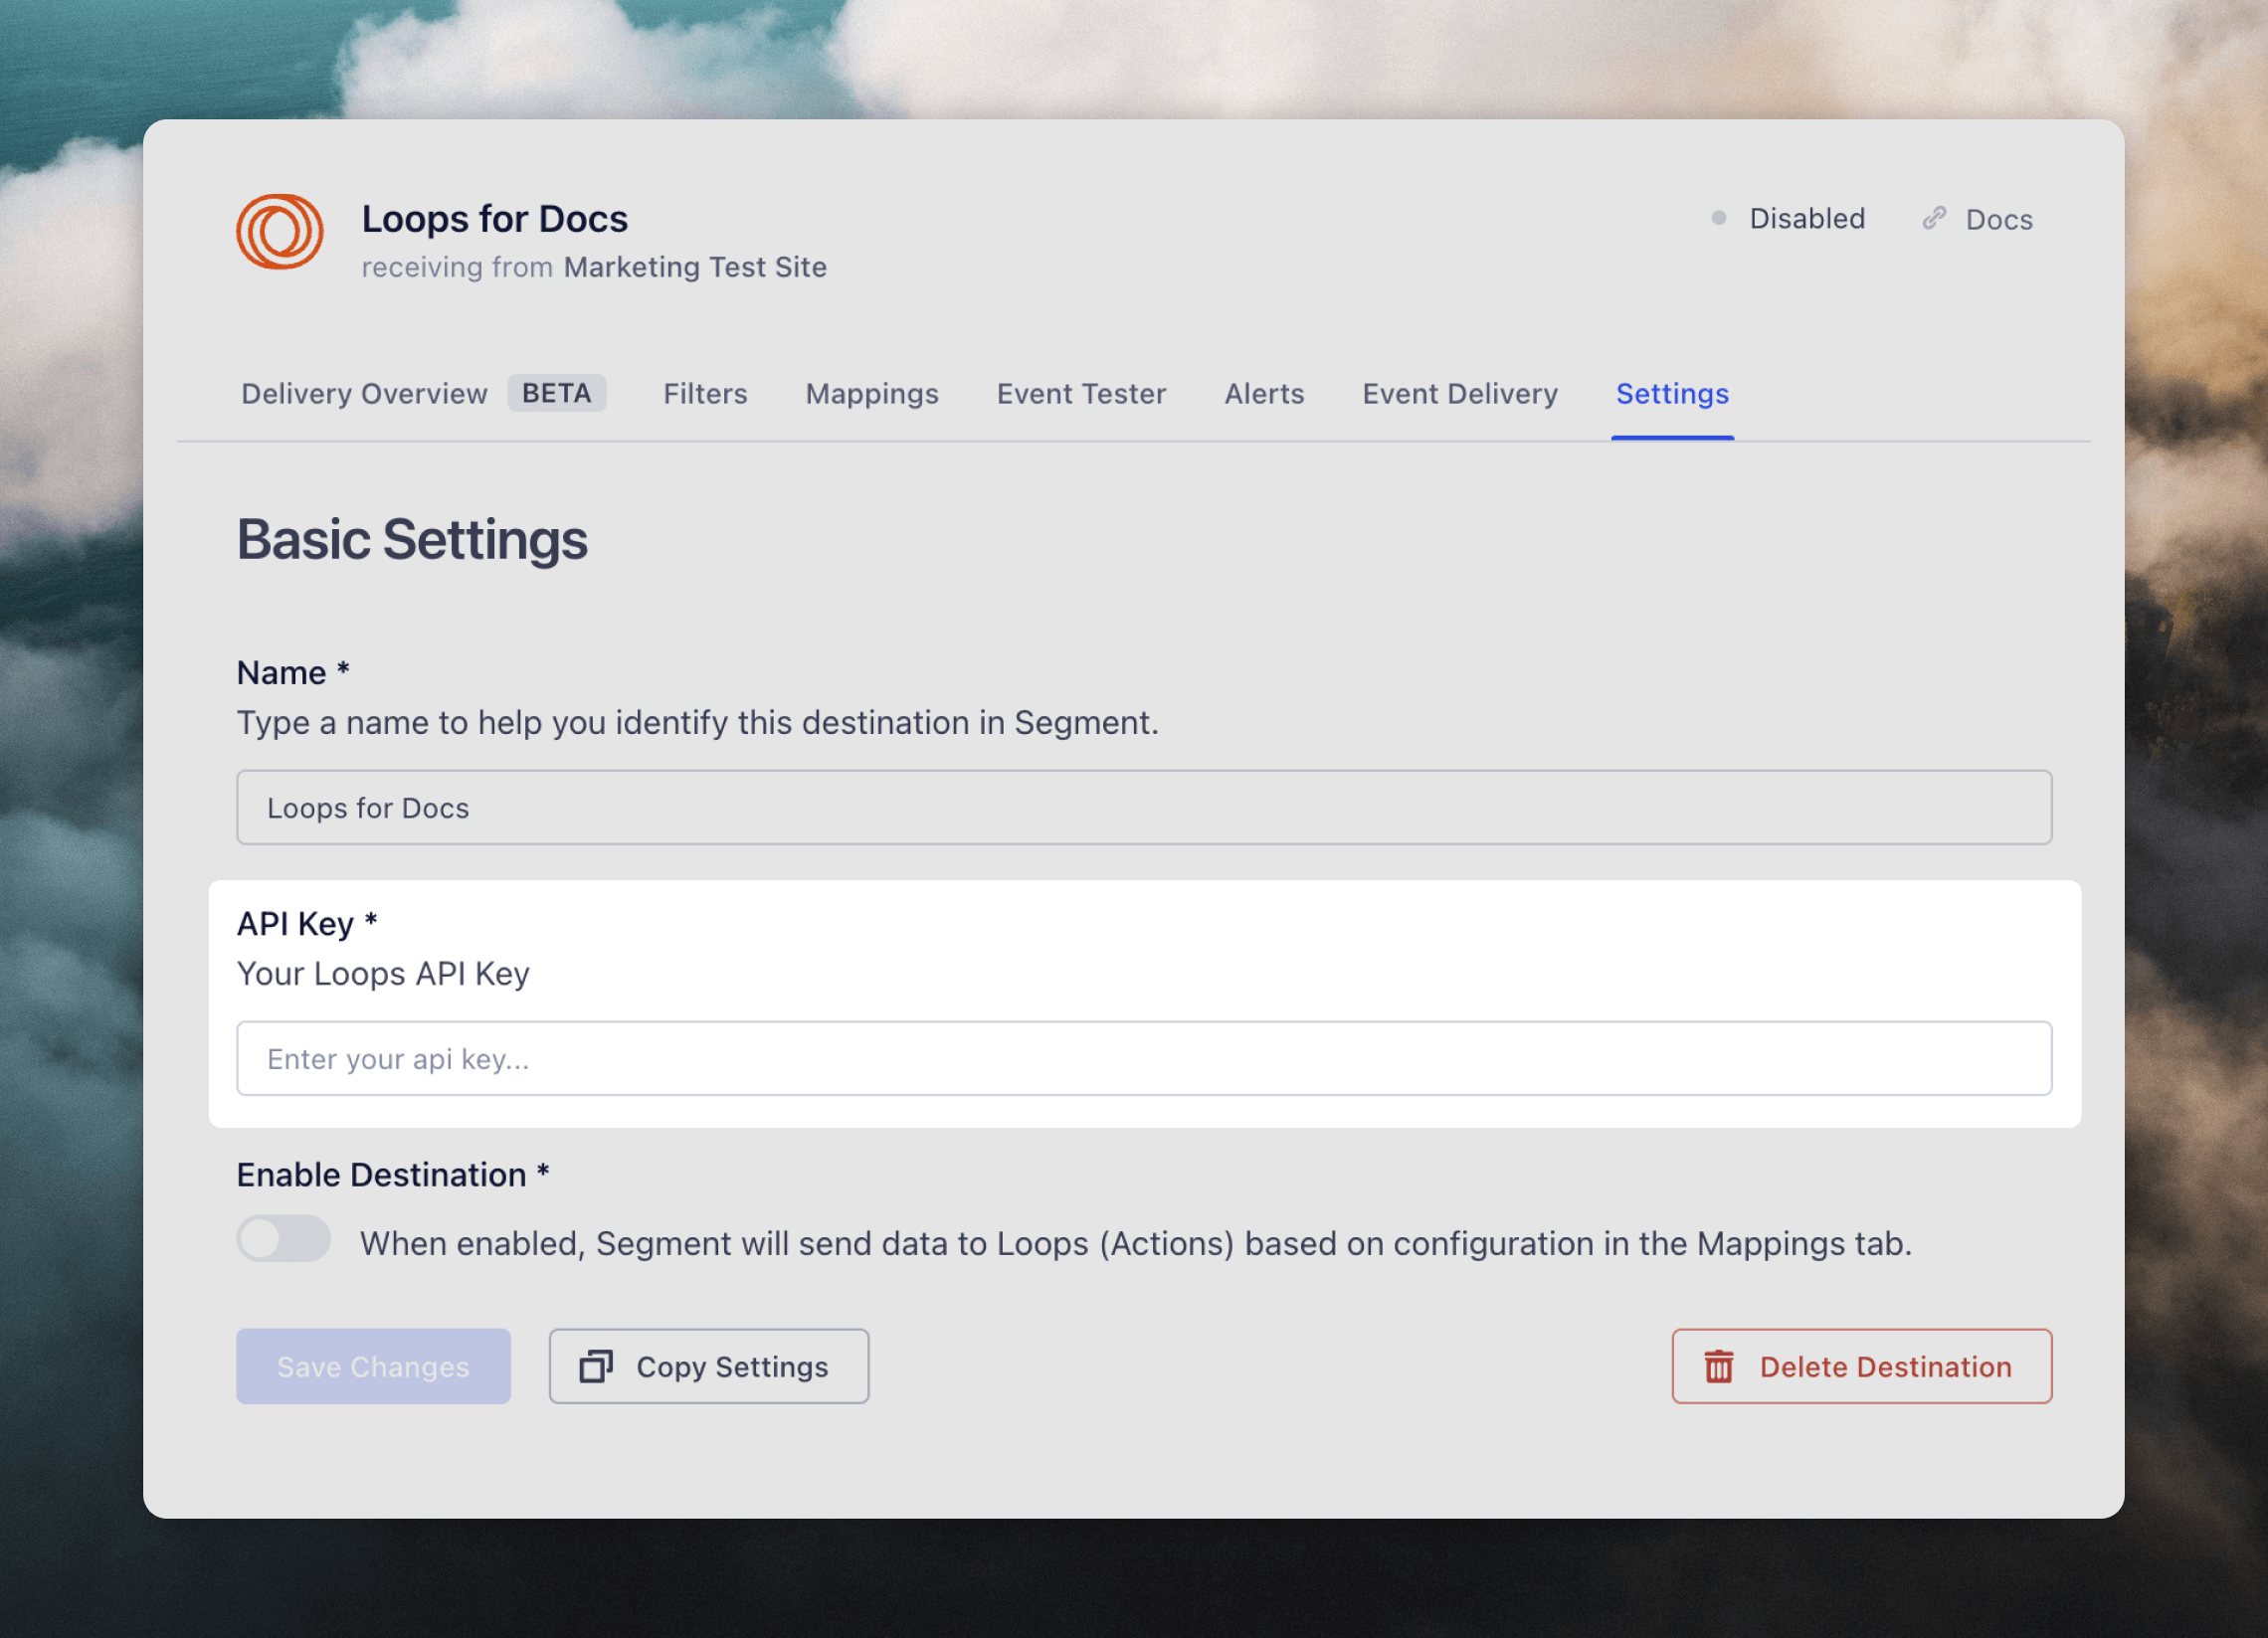 Enable the destination and click Save Changes. Note that no data will start flowing until you create specific mappings for Cocoonmail.
Mappings
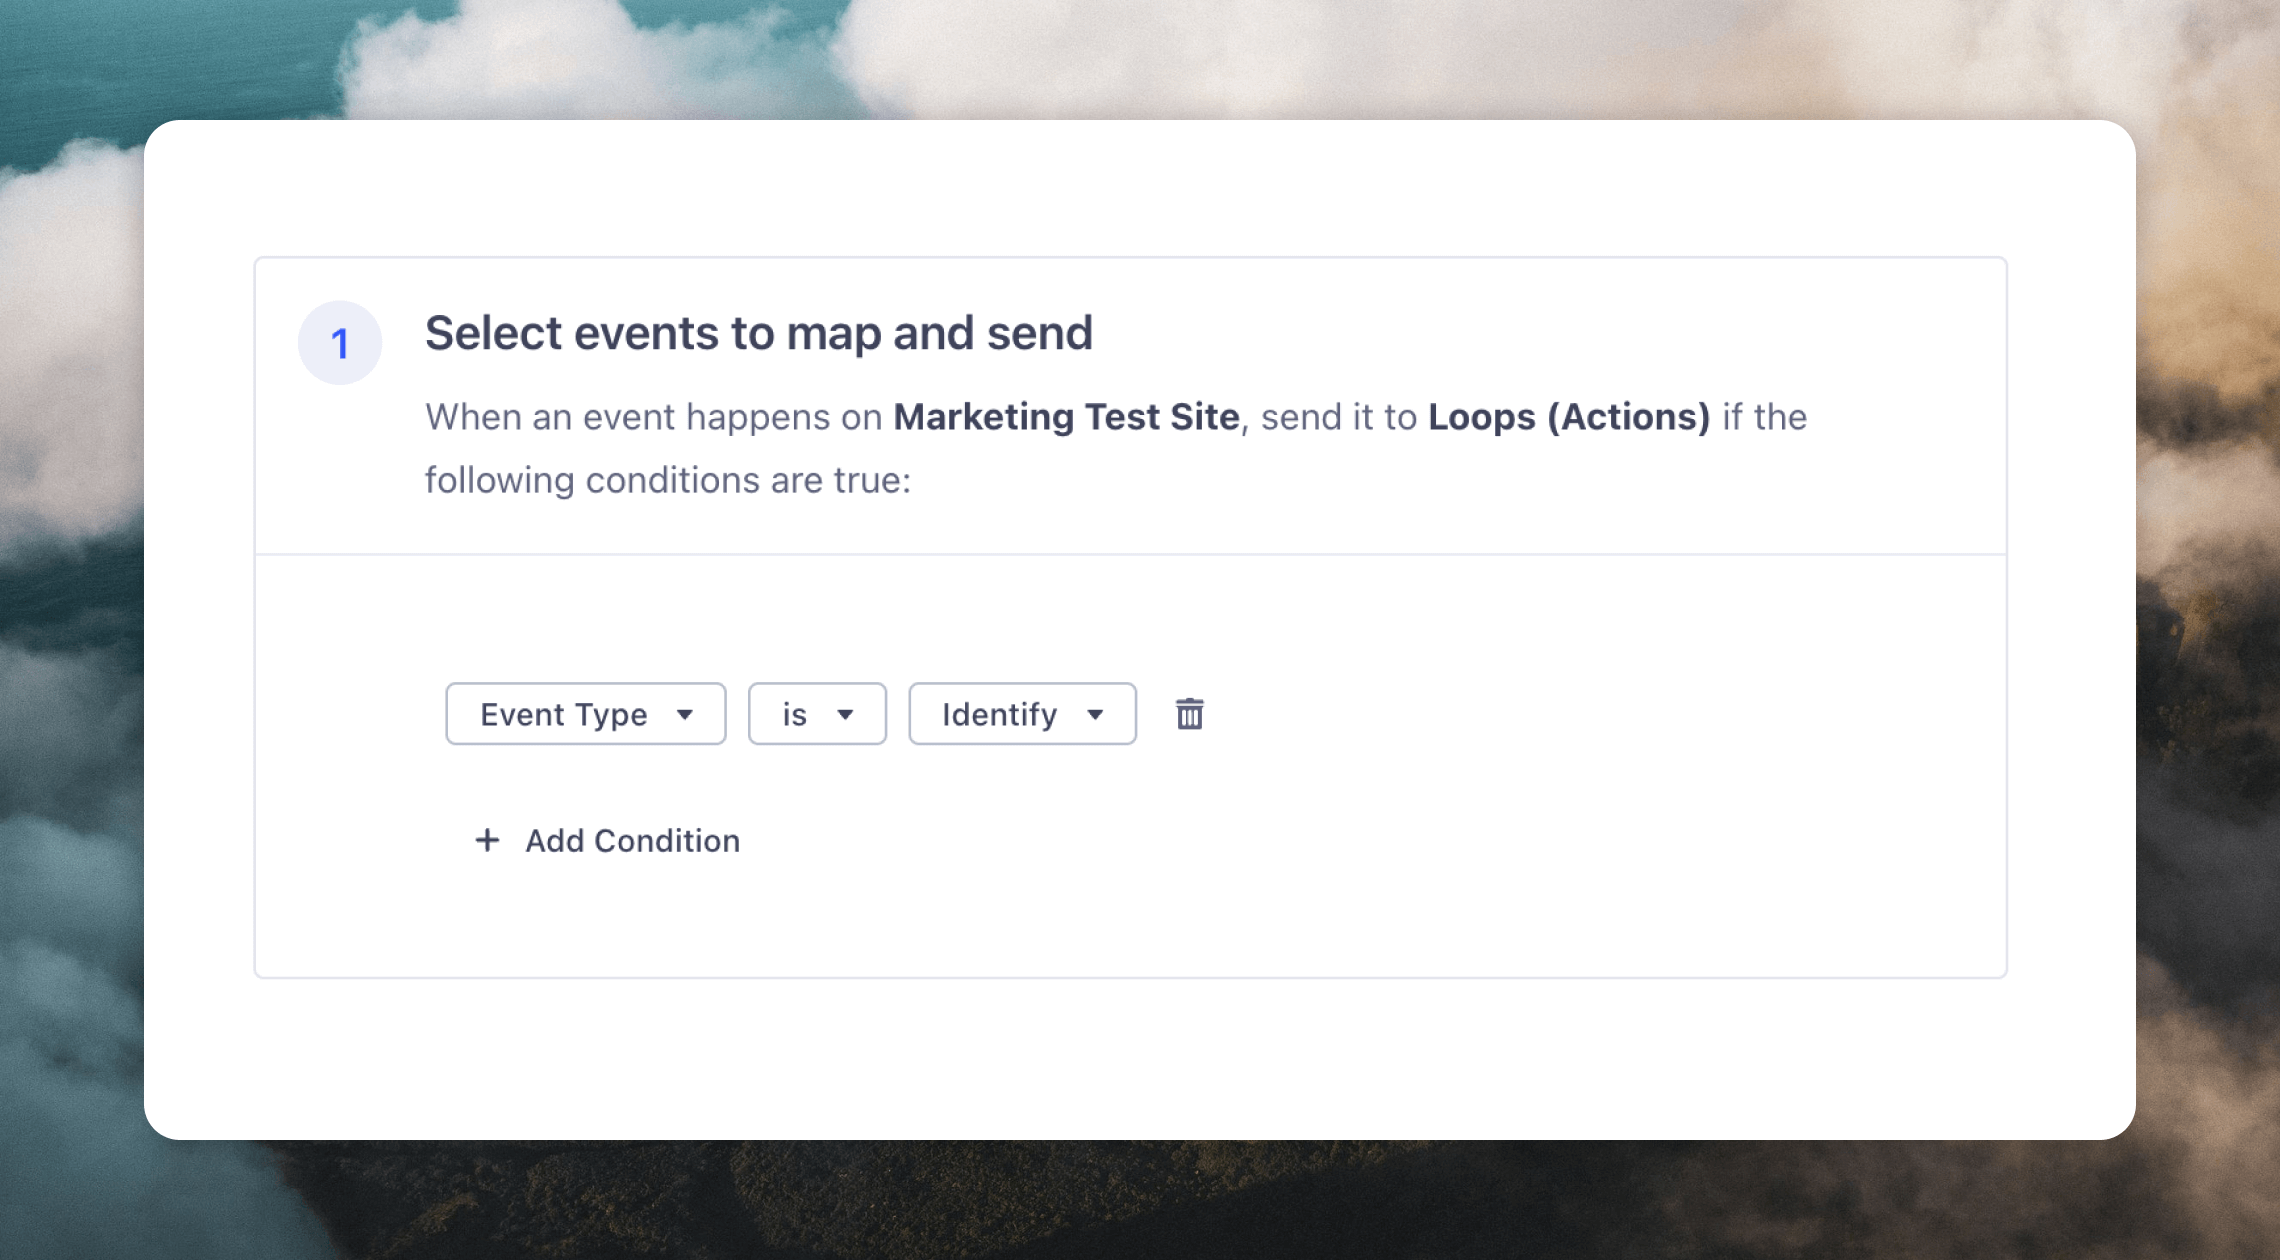
Segment action destinations require that you map specific fields from your source to your destination (in this case Cocoonmail). You can set this up by clicking into the Mappings tab and adding a new mapping. Currently we support updating contacts in Cocoonmail and sending events into Cocoonmail.Create or update contact
First, select which events to map. Typically for contact creation and updates, the most useful event to map will beidentify:
 When sending a contact details to Cocoonmail, keep in mind that it must contain an Email and a User ID.
The next step is to load a sample event to help you map fields appropriately. For the purpose of the docs, we’ll be using this
When sending a contact details to Cocoonmail, keep in mind that it must contain an Email and a User ID.
The next step is to load a sample event to help you map fields appropriately. For the purpose of the docs, we’ll be using this identify event:
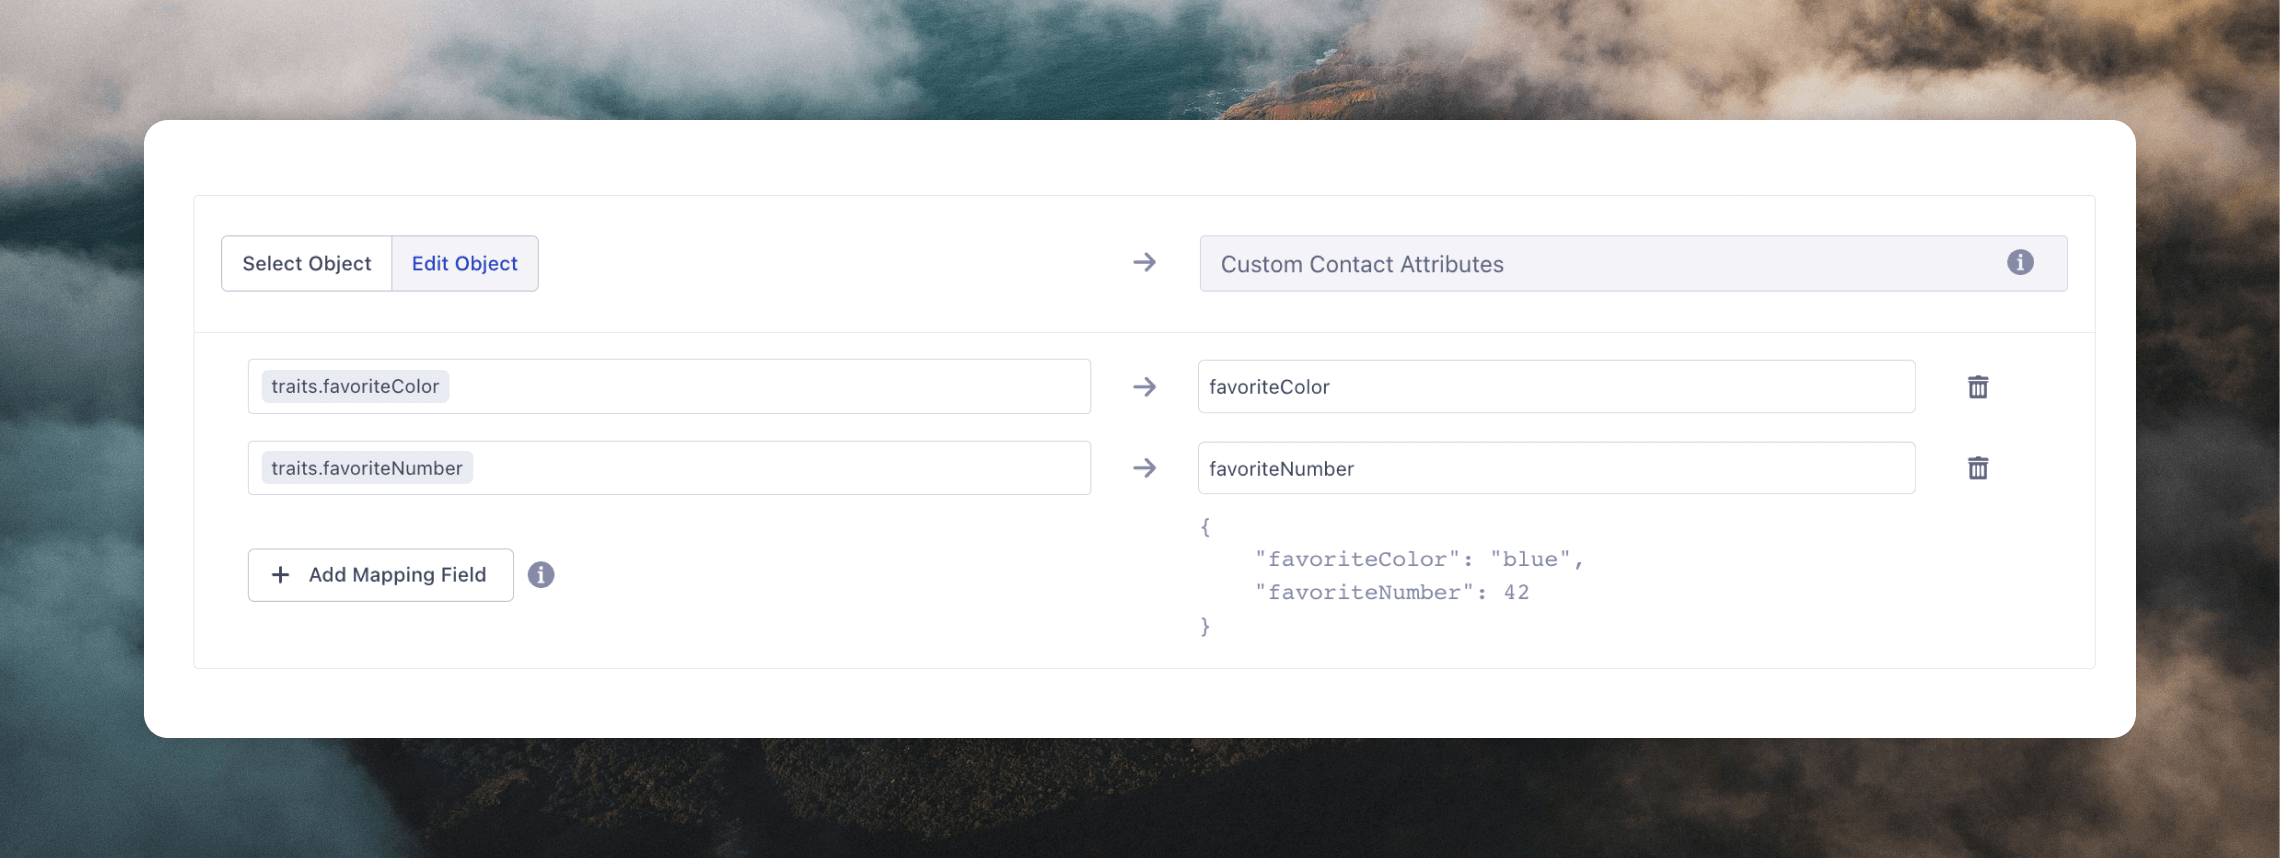
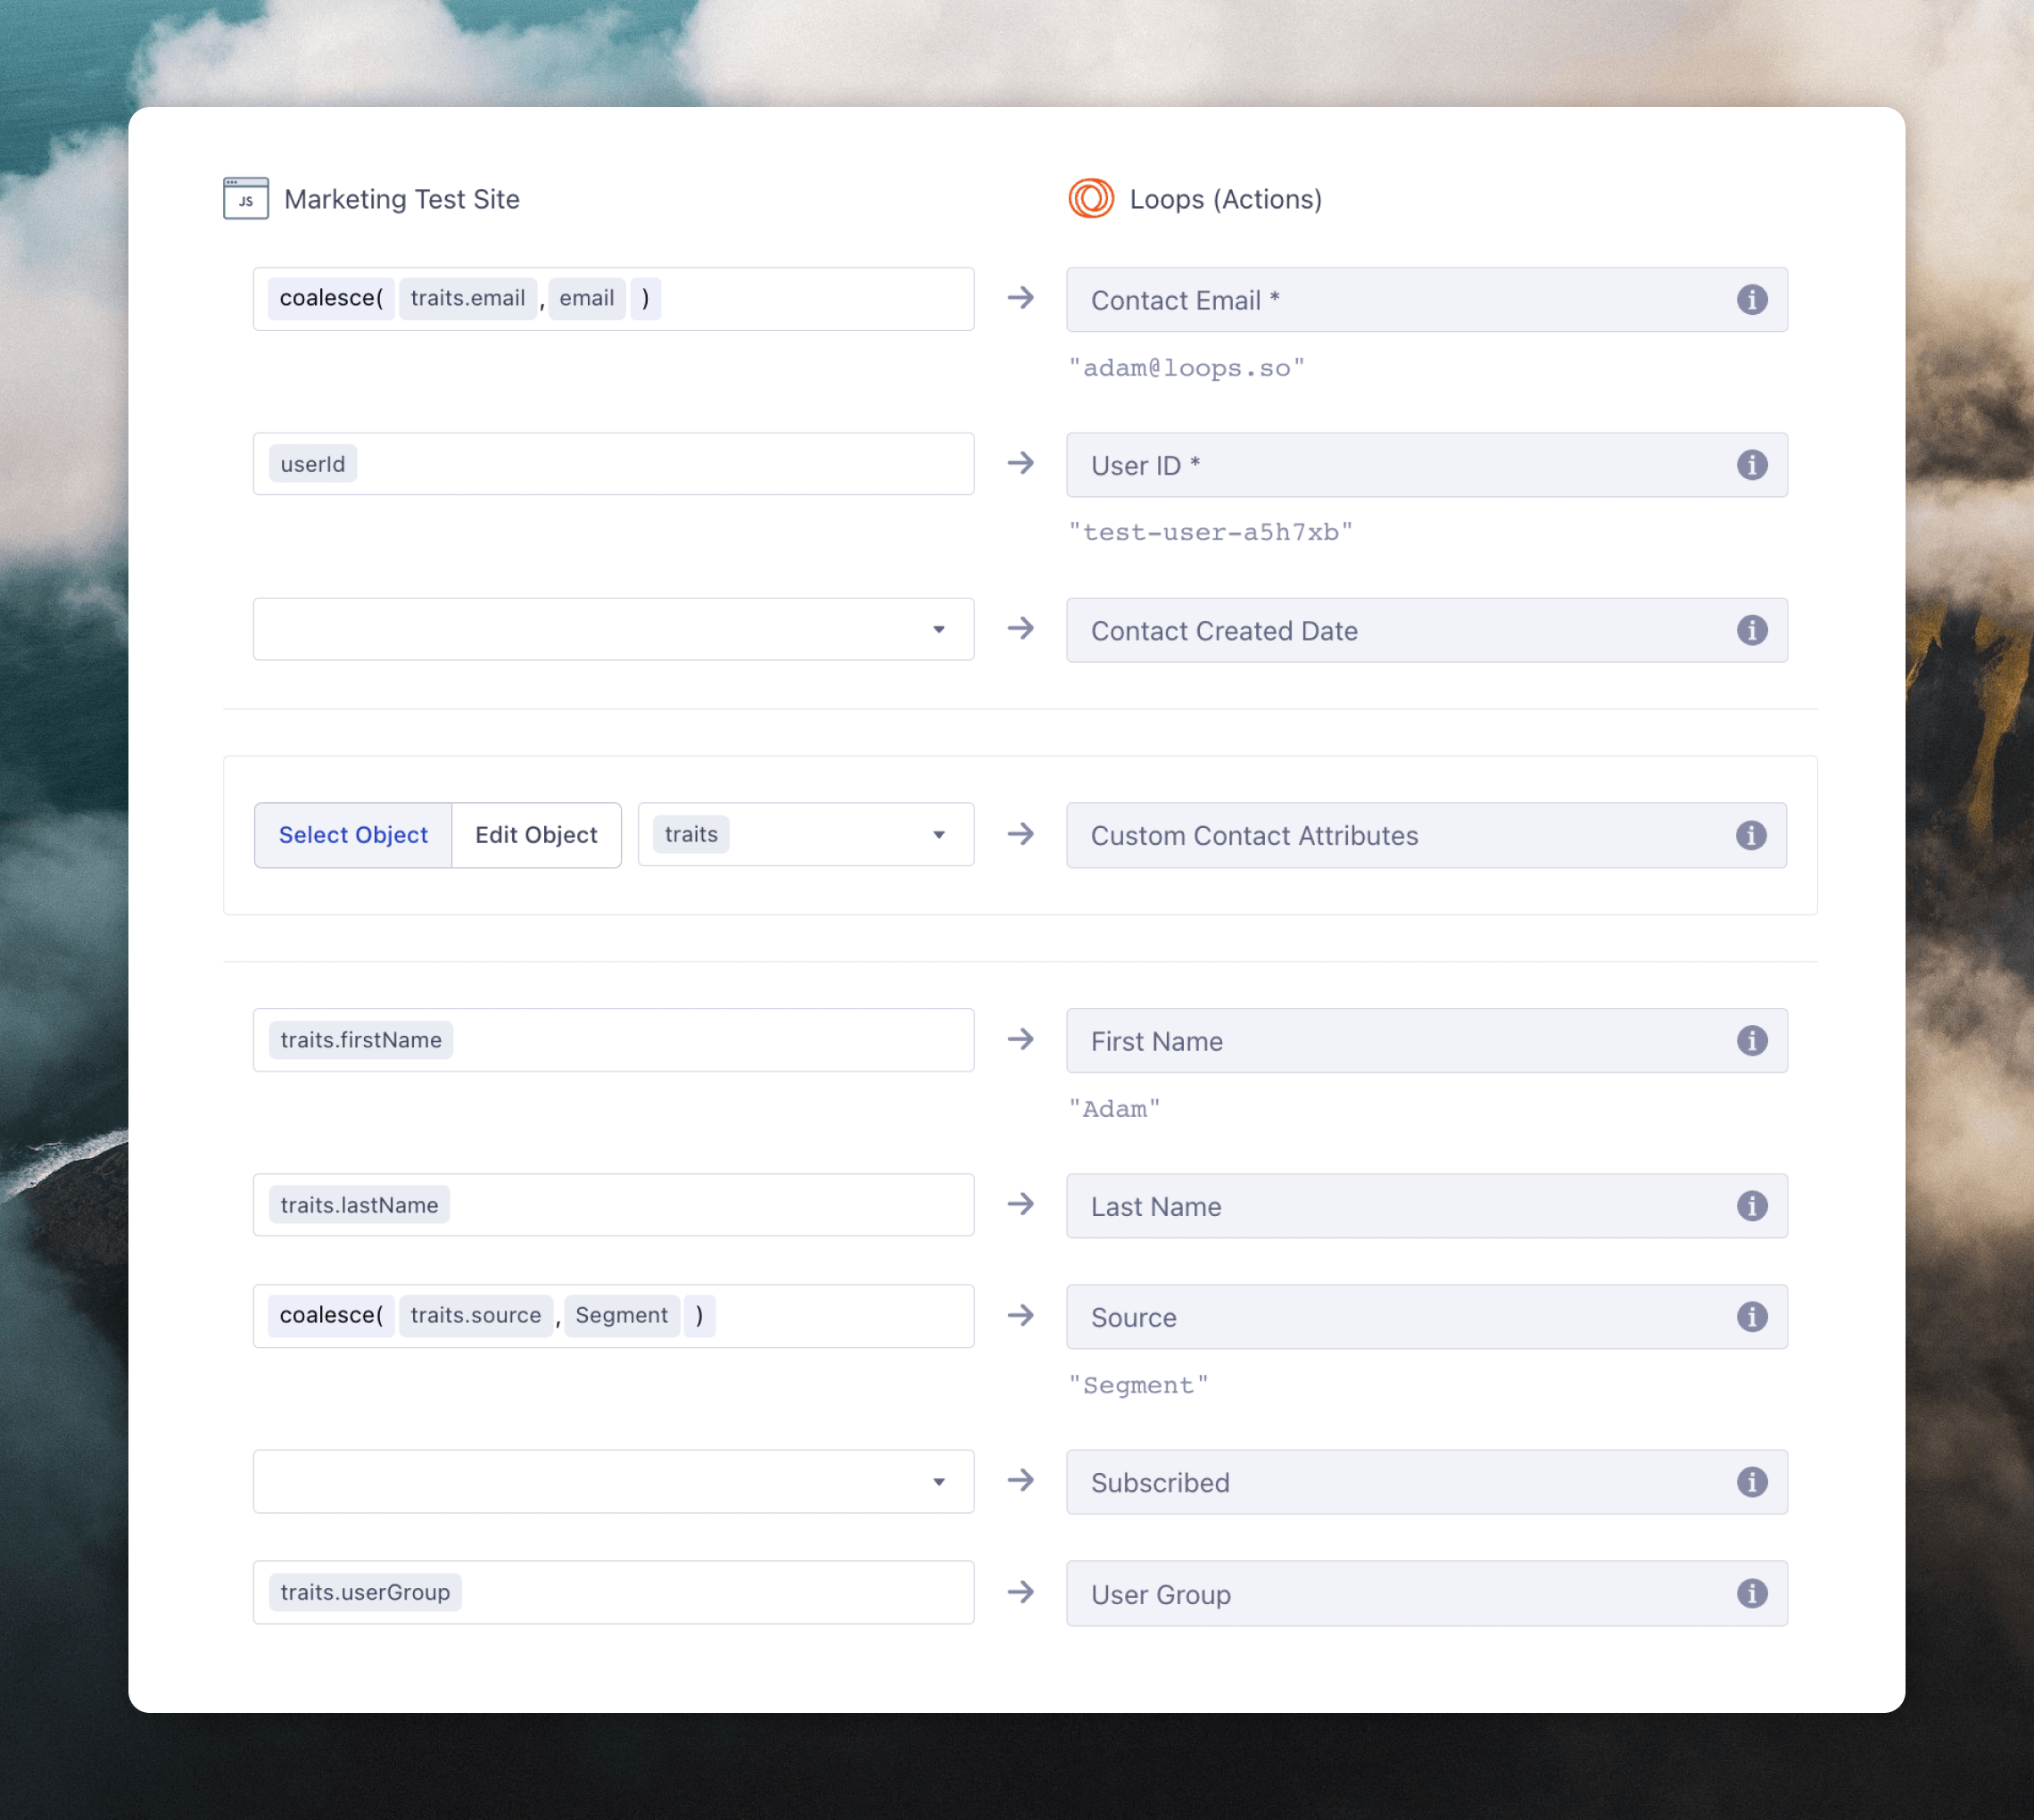 Segment does not provide an interface to provide the names and types for custom fields that you might be using with Cocoonmail. In this example, those fields are
 favoriteColor and favoriteNumber. However, these fields can be passed in as a dictionary to “Custom Contact Attributes”.
Ensure that the keys and values you provide match the schema you’ve created in your Contact Properties
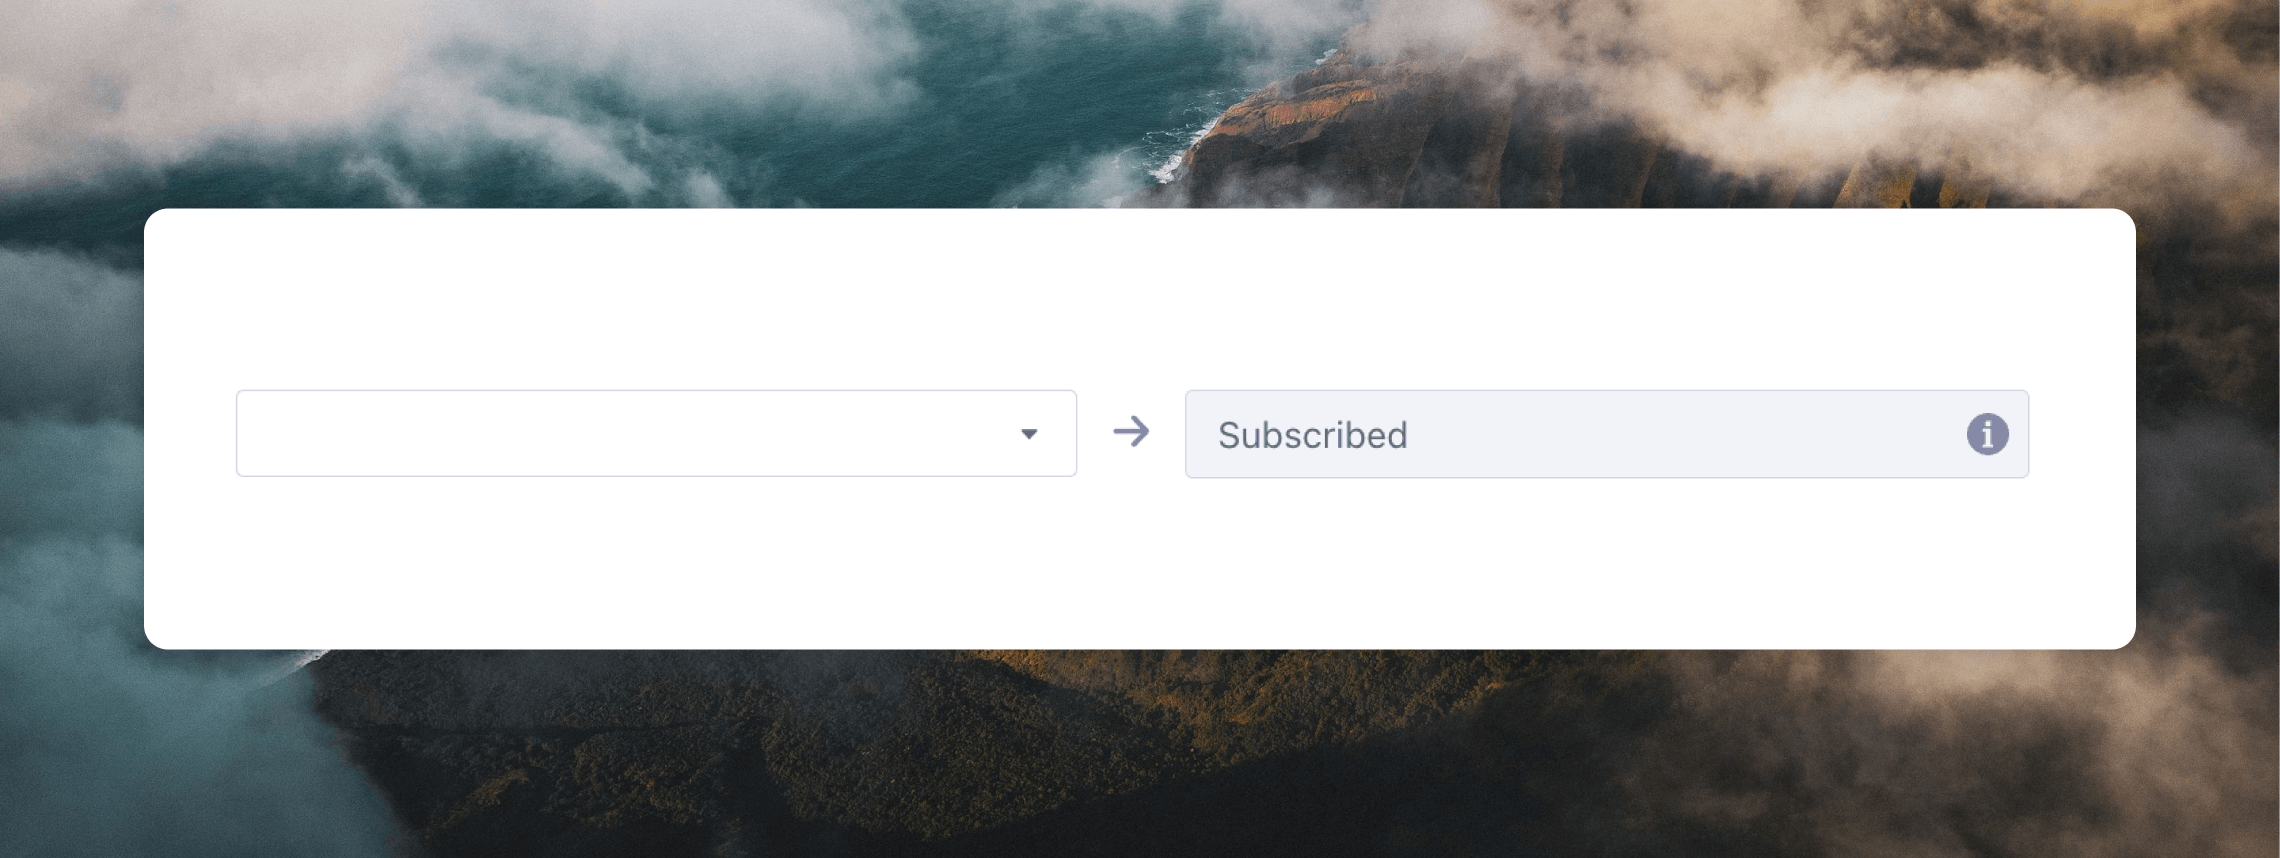
 In most cases, you want to leave the subscribed field as is (deselected). Setting this to true will resubscribe contacts to email if they had previously unsubscribed and setting it to false will unsubscribe contacts from email. Leaving it deselected will default new users to subscribed to email and not touch the contact’s email preference for existing contacts.
 After the mappings are configured, send the test event through and you should get a successful response:
 Check your Cocoonmail audience page to ensure the contact was created as intended.
Note, sending another test event with the same User ID or Email will update the existing contact instead of creating a new contact.
Send Event
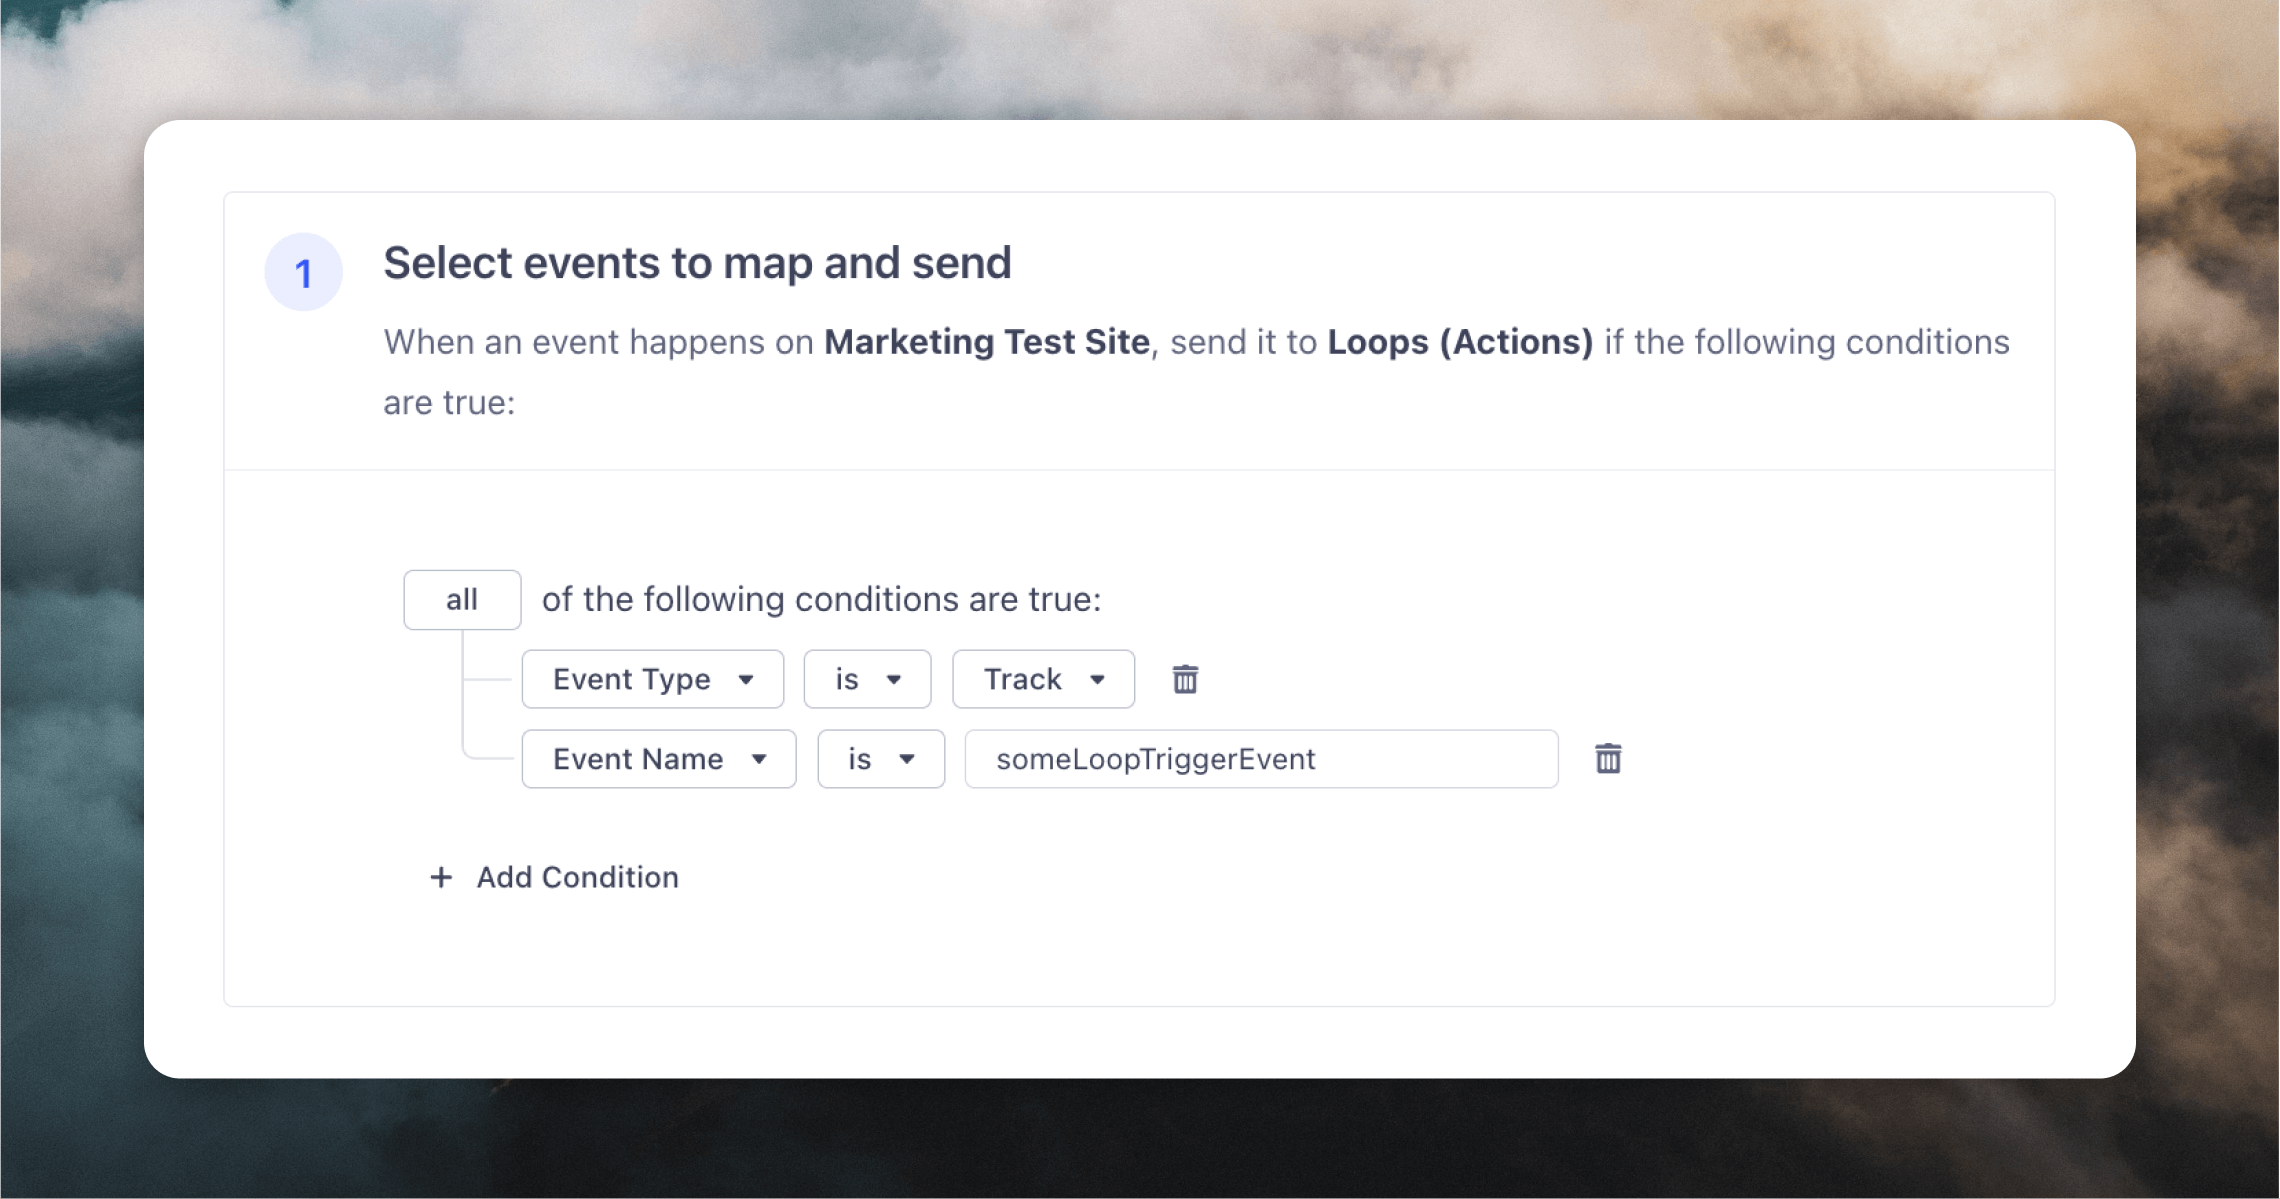
First, select which events to map. Typically for sending an event, the most useful event to map will betrack. It’s suggested you filter the events down to only ones that you plan on using within Cocoonmail:
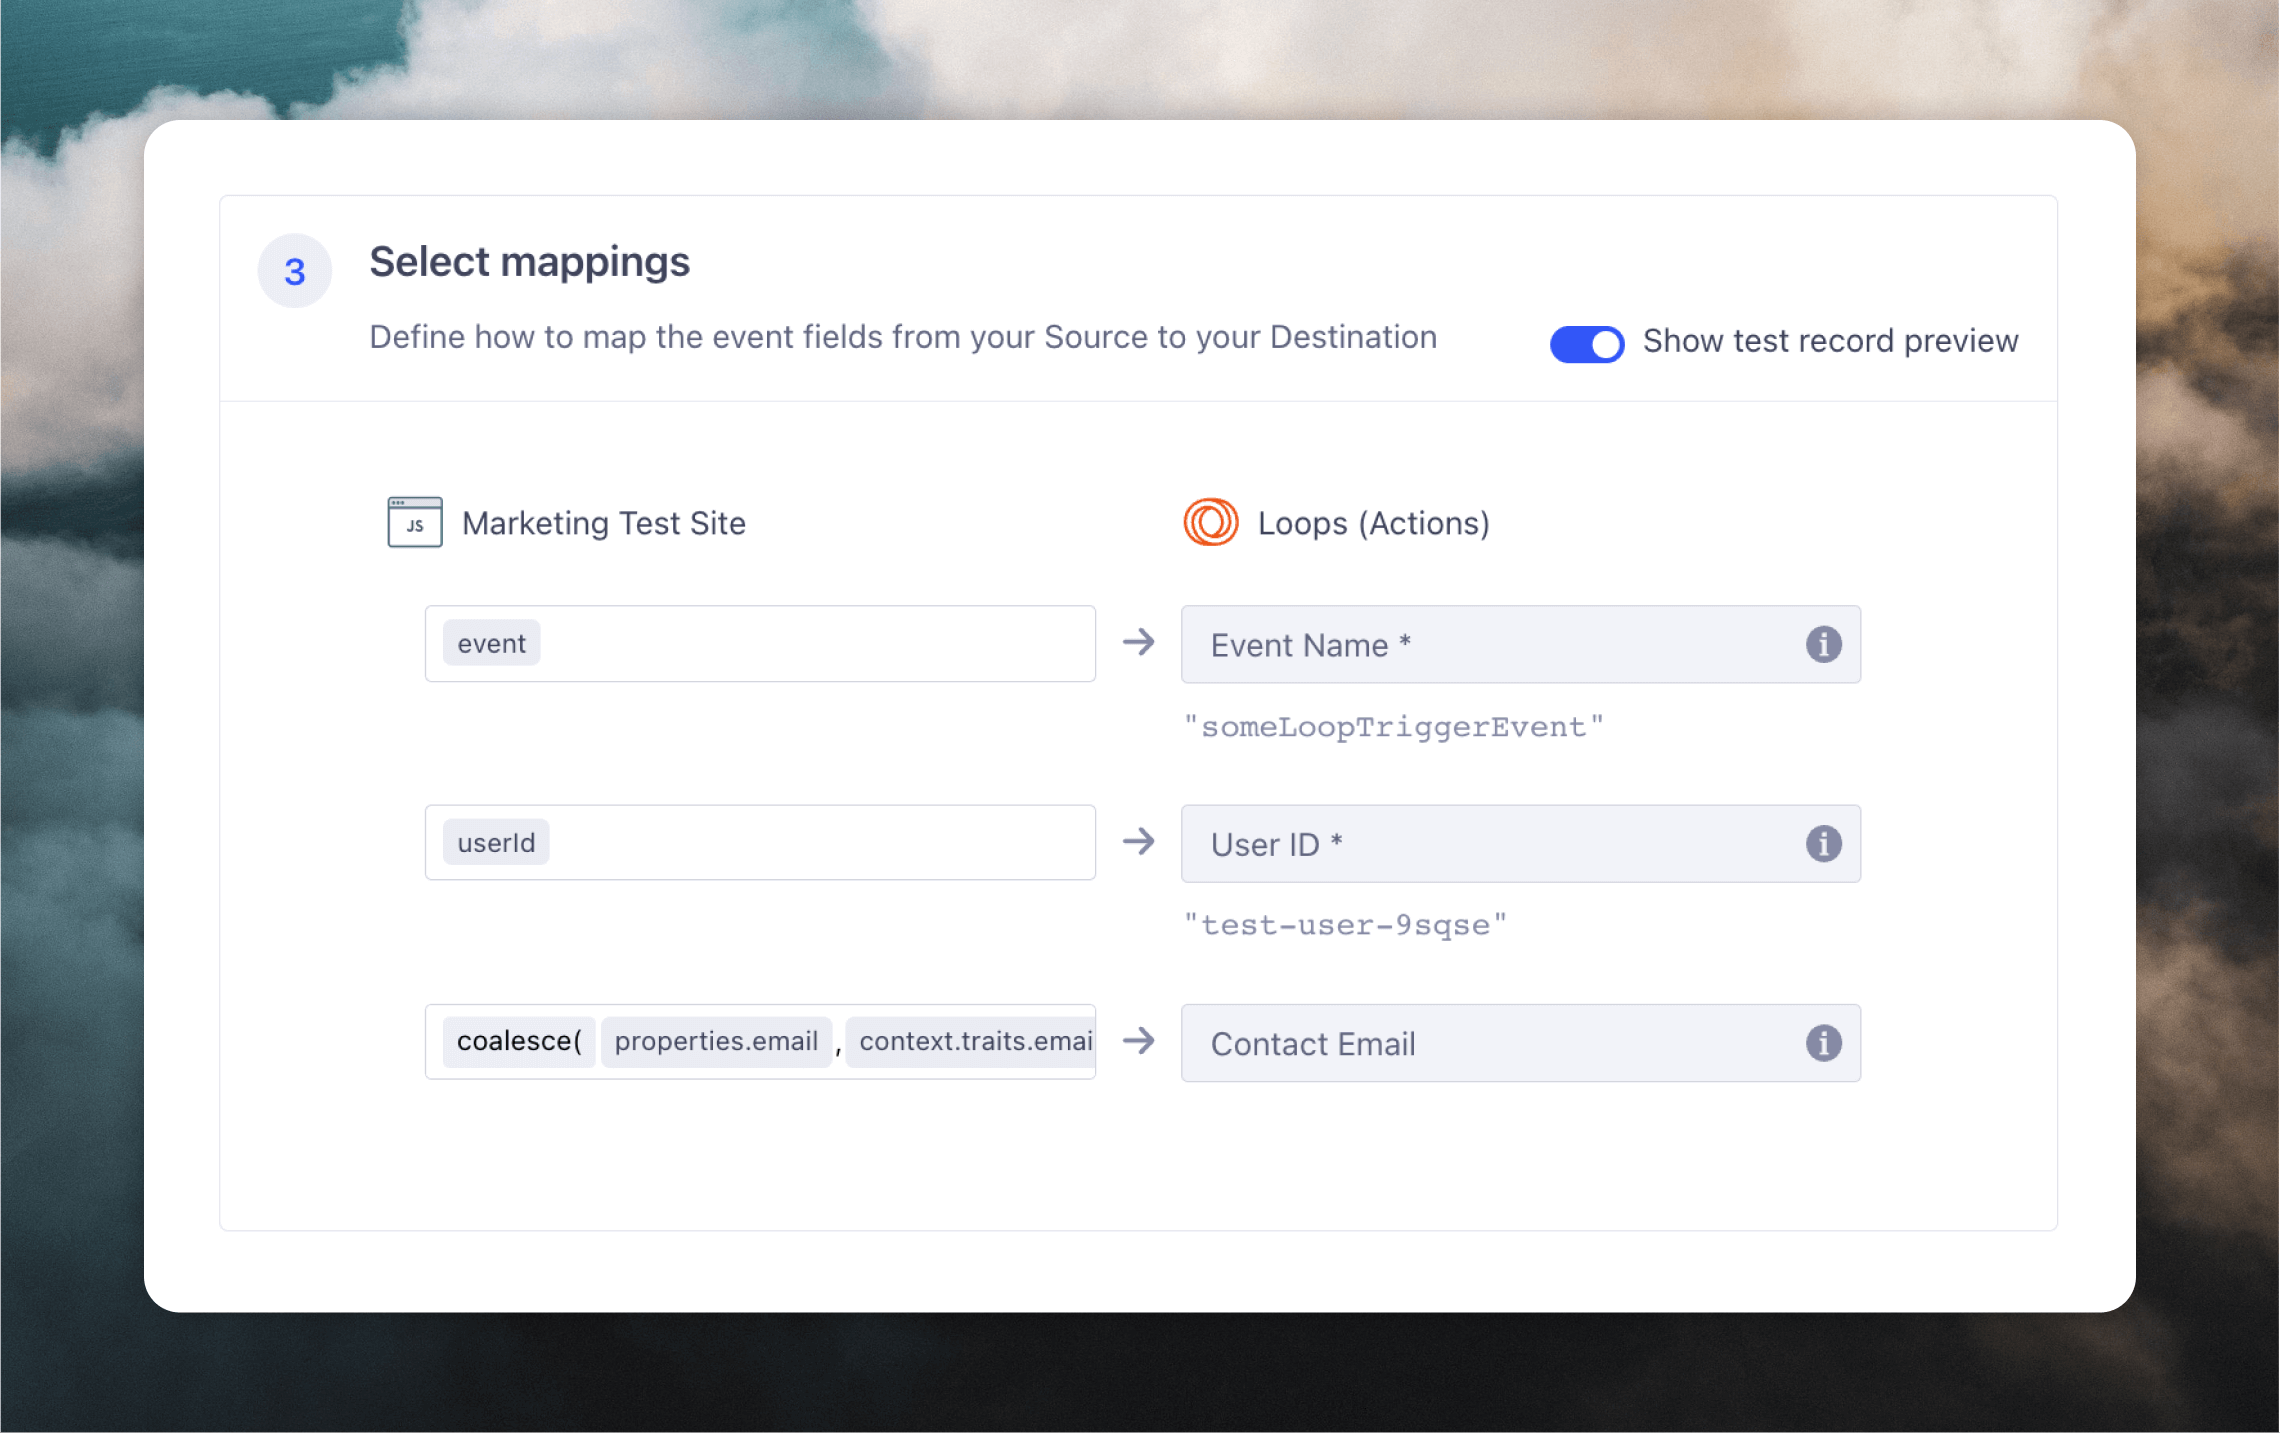
 Then after defining or loading a sample event, configure the mapping:
 If this contact already exists in your Cocoonmail audience, the email field is optional. Cocoonmail will trigger based on the User ID. If the contact does not exist in your Cocoonmail audience (perhaps you are not using an identify call), you will need to provide an email address otherwise Cocoonmail will not be able to create the contact for the event.
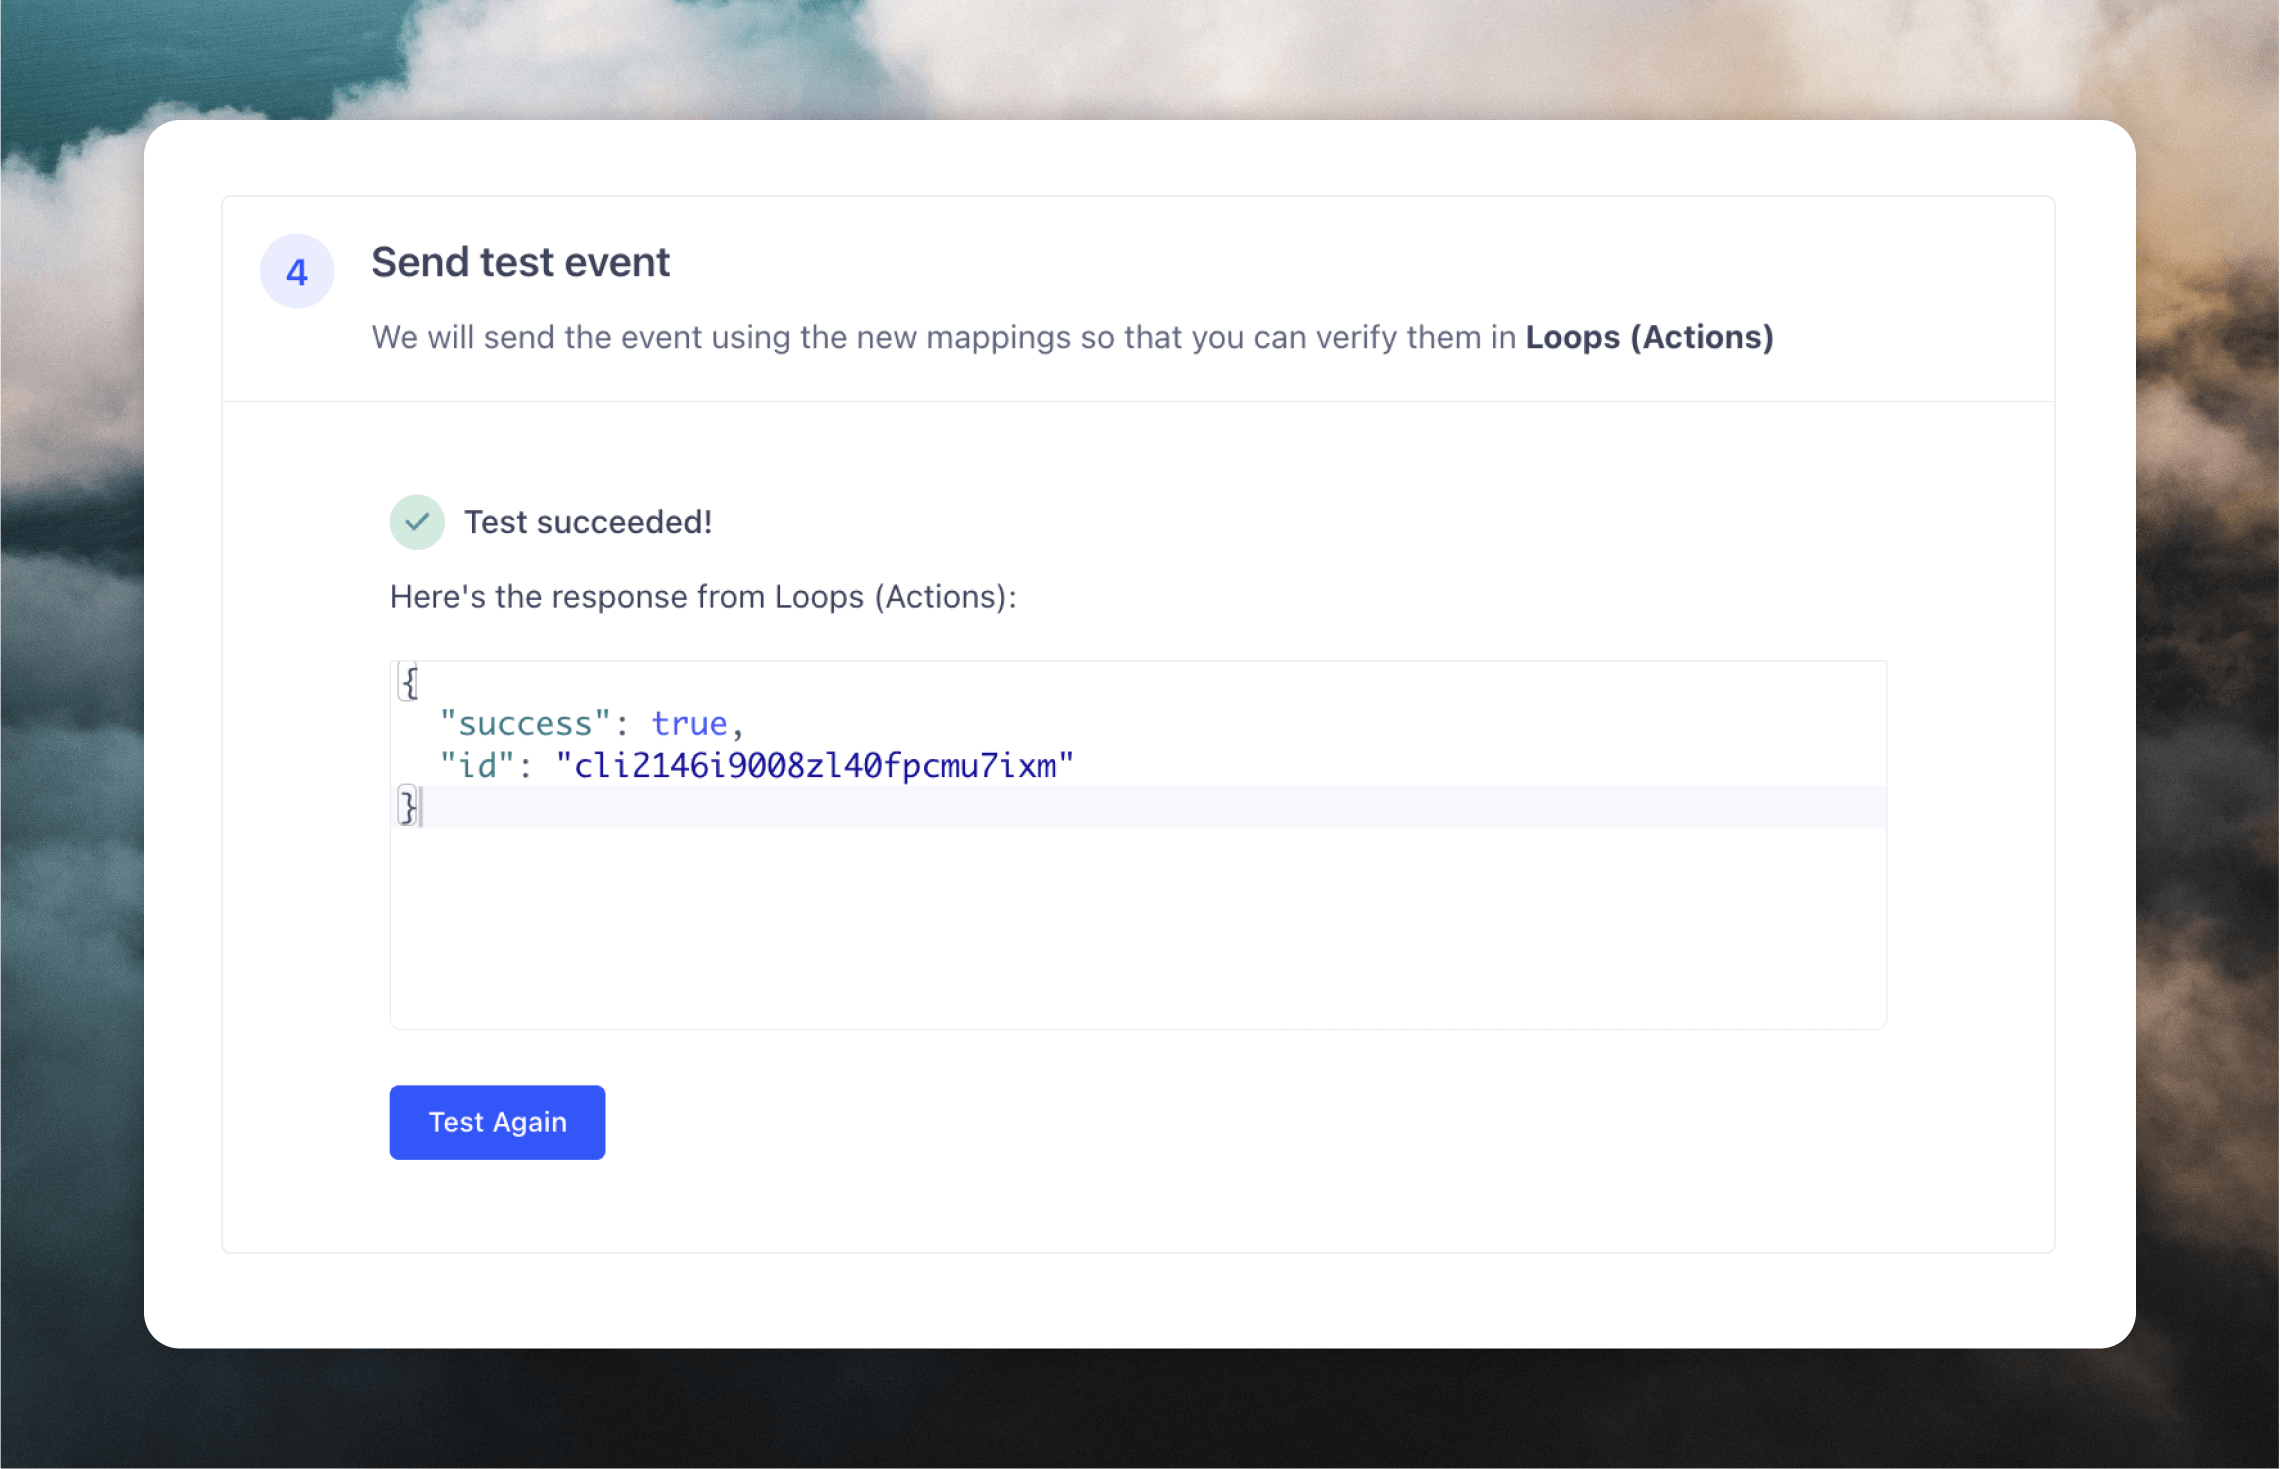
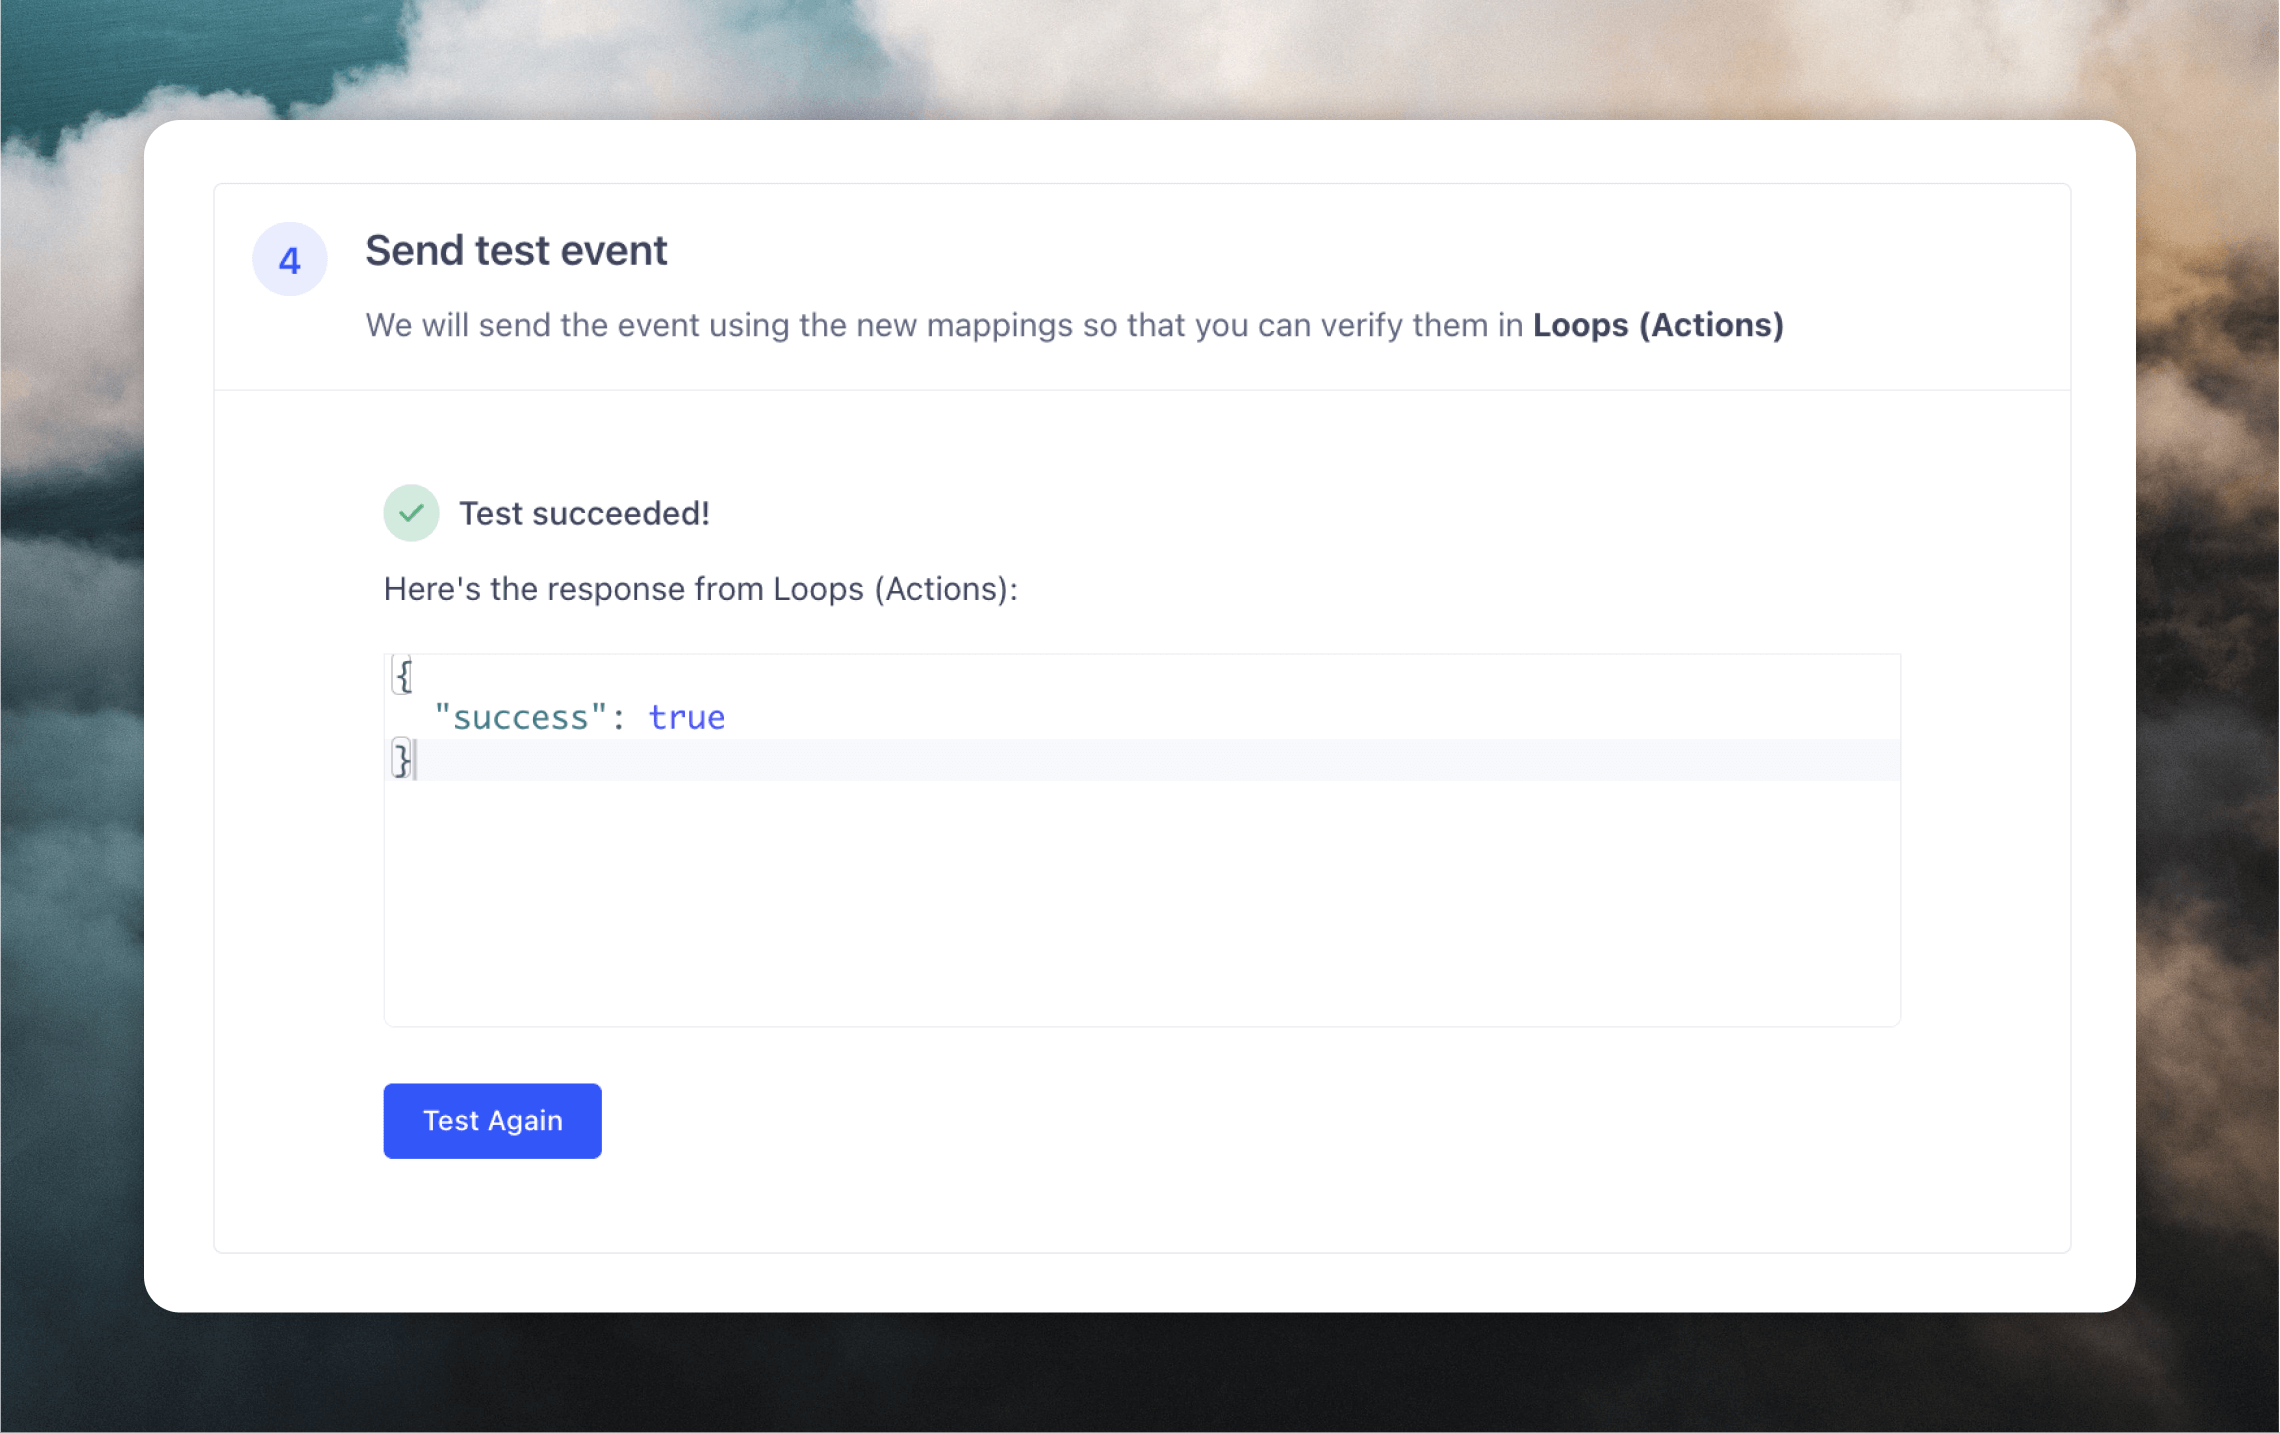
After configuring the mapping, you can send a test event and the response should indicate success:
If this contact already exists in your Cocoonmail audience, the email field is optional. Cocoonmail will trigger based on the User ID. If the contact does not exist in your Cocoonmail audience (perhaps you are not using an identify call), you will need to provide an email address otherwise Cocoonmail will not be able to create the contact for the event.
After configuring the mapping, you can send a test event and the response should indicate success:
 You can verify the event was received on your Events page in Cocoonmail.